> ## Documentation Index
> Fetch the complete documentation index at: https://developers.pleo.io/llms.txt
> Use this file to discover all available pages before exploring further.
# How to Queue Export Items in Pleo's Web App
export const WhatComesNext = ({children, href}) => ;
export const QueueExportItemsDiagram = () => {
const diagram = `
%%{init: {"themeVariables": {"fontSize": "28px"}}}%%
flowchart LR
S1["1. Open Exports"] --> S2["2. Select Expenses"] --> S3["3. Add to Export Queue"] --> S4["4. Open Export Queue"] --> S5["5. Confirm Expenses"] --> S6["6. Create Export Job"] --> S7["7. Export Job Created"]
click S1 "#1-open-exports"
click S2 "#2-select-expenses"
click S3 "#3-add-to-export-queue"
click S4 "#4-open-export-queue"
click S5 "#5-confirm-queued-expenses"
click S6 "#6-create-export-job"
click S7 "#7-export-job-is-created"
style S1 white-space:normal
style S2 white-space:normal
style S3 white-space:normal
style S4 white-space:normal
style S5 white-space:normal
style S6 white-space:normal
style S7 white-space:normal
`;
return ;
};
export const WorkflowDiagramTopNav = ({highlight}) => {
const highlightStyle = highlight ? `style ${highlight} stroke:#f63b92,stroke-width:5px` : "";
const diagram = `
%%{init: {"themeVariables": {"fontSize": "28px"}}}%%
flowchart LR
WEBAPP["Queue Export Items in Pleo's Web App"]
subgraph Pleo["Pleo API's"]
START1[" "]
A["1.Detect & Start Export Jobs"] --> B["2.Perform Pre-Export Validation"]
B --> C["3.Retrieve Export Job Items for Processing"]
C --> D["4.Fetch Export Item Data for Processing"]
end
subgraph ERP["AS/ERP"]
START2[" "]
E["5.Process & Record Export Items"]
end
subgraph Pleo2["Pleo API's"]
START3[" "]
F["6.Update Export Items"] --> G["7.Update & Complete Export Job"]
end
WEBAPP --> A
D --> E
E --> F
click WEBAPP "/docs/current/how-tos/accounting-integrations/how-to-queue-export-items-in-ui"
click A "/docs/current/how-tos/accounting-integrations/how-to-detect-and-start-export-jobs-for-as-erp-processing"
click B "/docs/current/how-tos/accounting-integrations/how-to-perform-pre-export-validation-for-as-erp-processing"
click C "/docs/current/how-tos/accounting-integrations/how-to-retrieve-export-job-items-for-as-erp-processing"
click D "/docs/current/how-tos/accounting-integrations/how-to-fetch-export-item-data-for-as-erp-processing"
click E "/docs/current/how-tos/accounting-integrations/how-to-determine-the-bookkeeping-method-for-as-erp-processing"
click F "/docs/current/how-tos/accounting-integrations/how-to-update-export-items-for-as-erp-processing"
click G "/docs/current/how-tos/accounting-integrations/how-to-update-and-complete-export-job-for-as-erp-processing"
style WEBAPP white-space:normal
style Pleo white-space:normal
style ERP white-space:normal
style Pleo2 white-space:normal
style A white-space:normal
style B white-space:normal
style C white-space:normal
style D white-space:normal
style E white-space:normal
style F white-space:normal
style G white-space:normal
style START1 fill:transparent,stroke:transparent,color:transparent
style START2 fill:transparent,stroke:transparent,color:transparent
style START3 fill:transparent,stroke:transparent,color:transparent
style Pleo fill:none,stroke:#000000
style ERP fill:none,stroke:#000000
style Pleo2 fill:none,stroke:#000000
${highlightStyle}
`;
return ;
};
export const NoteCallout = ({title, children, icon = "💡"}) =>
{icon}
{title &&
{title}
}
{children}
;
export const RememberCallout = ({title, children, icon = "🪢"}) =>
{icon}
{title &&
{title}
}
{children}
;
This how-to explains how to queue expenses in Pleo’s Web App so they can be picked up and processed by an accounting integration.
## Prerequisites
Before you begin:
* You have access to the Pleo Web App
* You are logged in as an **Admin** or **Bookkeeper**
## Steps
### 1. Open Exports
Select **Exports** from the main left-hand navigation.
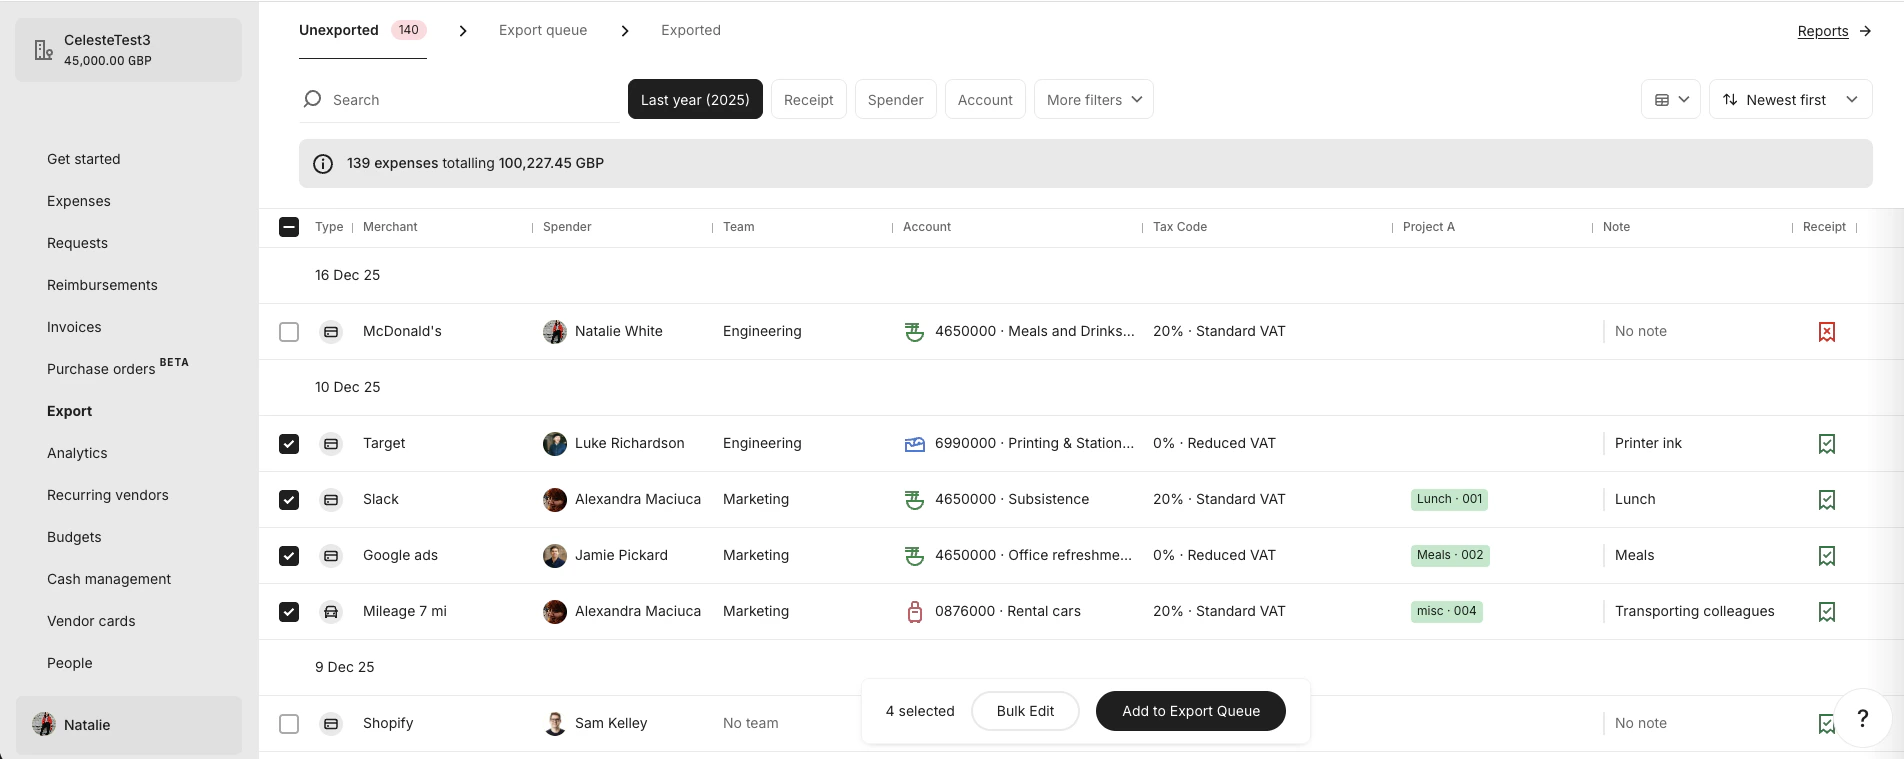
### 2. Select expenses
Check the tickboxes next to the expenses you want to export.
### 3. Add to Export Queue
Click **Add to Export Queue** at the bottom of your screen.
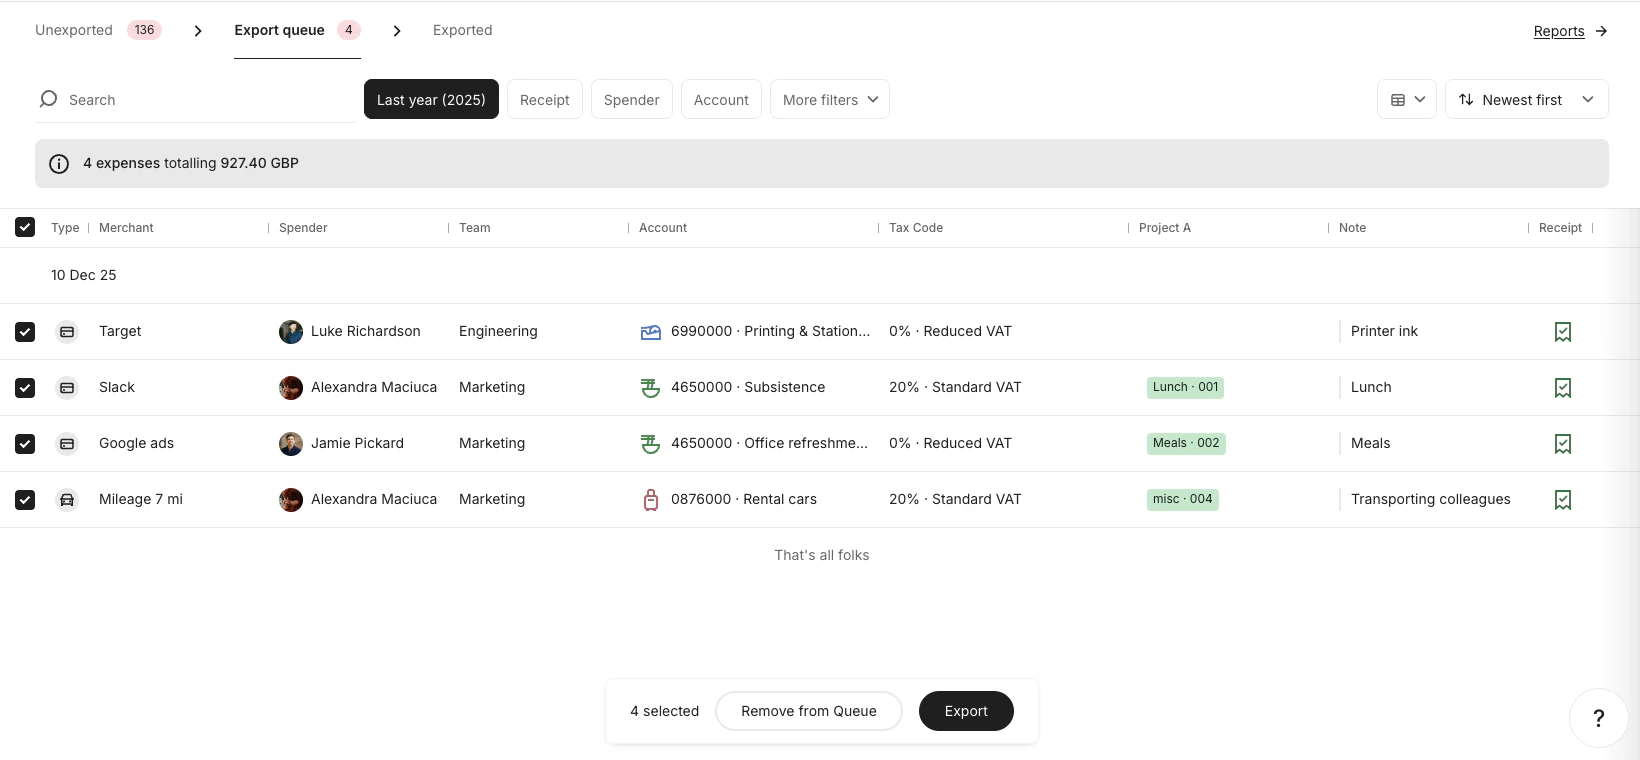
### 4. Open Export Queue
Click the **Export Queue** tab at the top of your screen.
### 5. Confirm queued expenses
In the **Export Queue** tab, select the expenses you want to include in the export.
### 6. Create Export Job
Click **Export** at the bottom of your screen.
### 7. Export Job is created
Once you click **Export**:
* An **Export Job** is created
* The selected expenses become **Export Items**
* These items are locked and can no longer be edited
Export Items cannot be modified after they are added to an Export Job.
## Result
After completing these steps:
* An **Export Job** has been created
* The selected expenses are now **Export Items**
* These items are available for your integration to detect and process
***
## What Comes Next?
How to Detect and Start Export Jobs for Processing
***
## Related Reading
* [Export Lifecycle](/docs/current/platform/exports/lifecycle)
* [Connection and Authorisation Overview](/docs/current/integration-design/auth/integration-design-auth-overview)
***