> ## Documentation Index
> Fetch the complete documentation index at: https://developers.pleo.io/llms.txt
> Use this file to discover all available pages before exploring further.
# How to Create Vendors in Pleo
> For Vendor Creation, what happens when a bookkeeper creates a new Vendor directly in Pleo, and the DRAFT state your integration detects.
export const CreateVendorInPleoDiagram = () => {
const [isDark, setIsDark] = useState(false);
useEffect(() => {
const check = () => setIsDark(document.documentElement.classList.contains("dark"));
check();
const observer = new MutationObserver(check);
observer.observe(document.documentElement, {
attributes: true,
attributeFilter: ["class"]
});
return () => observer.disconnect();
}, []);
const nodeFill = isDark ? "#212222" : "#EEF4F4";
const nodeStroke = isDark ? "#848989" : "#E1E6E6";
const nodeTextStyle = isDark ? ",color:#EEF4F4" : ",color:#131414";
const s3Fill = isDark ? "#212222" : "#EEF4F4";
const s3Stroke = isDark ? "#848989" : "#212222";
const s3TextStyle = isDark ? ",color:#EEF4F4" : ",color:#212222";
const linkStyle = isDark ? "" : "linkStyle default stroke:#848989,stroke-width:1px;";
const diagram = `
%%{init: {"themeVariables": {"fontSize": "10px"}}}%%
flowchart LR
S1["1. Verify Vendor
doesn't already exist"] --> S2["2. Create the
new Vendor"] --> S3["Vendor state: DRAFT"]
click S1 "#1-verify-that-the-vendor-doesn’t-already-exist"
click S2 "#2-create-the-new-vendor"
style S1 white-space:normal,fill:${nodeFill},stroke:${nodeStroke}${nodeTextStyle}
style S2 white-space:normal,fill:${nodeFill},stroke:${nodeStroke}${nodeTextStyle}
style S3 white-space:normal,fill:${s3Fill},stroke:${s3Stroke},stroke-dasharray:5 5${s3TextStyle}
${linkStyle}
`;
return ;
};
export const VendorCreationWorkflowDiagramTopNav = ({highlight}) => {
const [isDark, setIsDark] = useState(false);
useEffect(() => {
const check = () => setIsDark(document.documentElement.classList.contains("dark"));
check();
const observer = new MutationObserver(check);
observer.observe(document.documentElement, {
attributes: true,
attributeFilter: ["class"]
});
return () => observer.disconnect();
}, []);
const nodeFill = isDark ? "#212222" : "#EEF4F4";
const nodeStroke = isDark ? "#848989" : "#E1E6E6";
const nodeTextStyle = isDark ? ",color:#EEF4F4" : ",color:#131414";
const subgraphFill = isDark ? "#131414" : "#ffffff";
const subgraphStroke = isDark ? "#848989" : "#6B7070";
const subgraphTextStyle = isDark ? ",color:#EEF4F4" : ",color:#6B7070";
const linkStyle = isDark ? "" : "linkStyle default stroke:#848989,stroke-width:1px;";
const highlightStyle = highlight ? `style ${highlight} stroke:#FEB6FE,stroke-width:2px` : "";
const diagram = `
%%{init: {"themeVariables": {"fontSize": "16px"}}}%%
flowchart LR
subgraph Pleo1["Pleo"]
A["1. Create Vendor in Pleo"]
end
subgraph Integration["Integration"]
B["2. Detect Draft
Vendor
"]
C["3. Create Vendor
in AS
"]
B --> C
end
subgraph Pleo2["Pleo"]
D["4. Activate Vendor in Pleo"]
end
A --> B
C --> D
click A "/docs/current/how-tos/accounting-integrations/vendors/how-to-create-vendors-in-pleo"
click B "/docs/current/how-tos/accounting-integrations/vendors/how-to-detect-draft-vendors"
click C "/docs/current/how-tos/accounting-integrations/vendors/how-to-create-vendor-in-as"
click D "/docs/current/how-tos/accounting-integrations/vendors/how-to-activate-vendor-in-pleo"
style A white-space:normal,fill:${nodeFill},stroke:${nodeStroke}${nodeTextStyle}
style B white-space:normal,fill:${nodeFill},stroke:${nodeStroke}${nodeTextStyle}
style C white-space:normal,fill:${nodeFill},stroke:${nodeStroke}${nodeTextStyle}
style D white-space:normal,fill:${nodeFill},stroke:${nodeStroke}${nodeTextStyle}
style Pleo1 fill:${subgraphFill},stroke:${subgraphStroke}${subgraphTextStyle}
style Integration fill:${subgraphFill},stroke:${subgraphStroke}${subgraphTextStyle}
style Pleo2 fill:${subgraphFill},stroke:${subgraphStroke}${subgraphTextStyle}
${highlightStyle}
${linkStyle}
`;
return ;
};
export const WhatComesNext = ({children, href}) => ;
This how-to explains the trigger event for the rest of Vendor Creation: a bookkeeper adding a new Vendor directly in Pleo, before it exists anywhere in the Accounting System.
This is not an integration step. Your integration does not build or call anything here, a bookkeeper performs this action in the Pleo Web App. It matters to your integration because it produces the `DRAFT` Vendor that [How to Detect Draft Vendors](/docs/current/how-tos/accounting-integrations/vendors/how-to-detect-draft-vendors) picks up next.
## Scenario
This how-to uses a consistent example, carried through the rest of Vendor Creation: a bookkeeper adds "Greenfield Logistics" as a new Vendor while tagging an expense, before it exists yet in the Accounting System.
## Steps
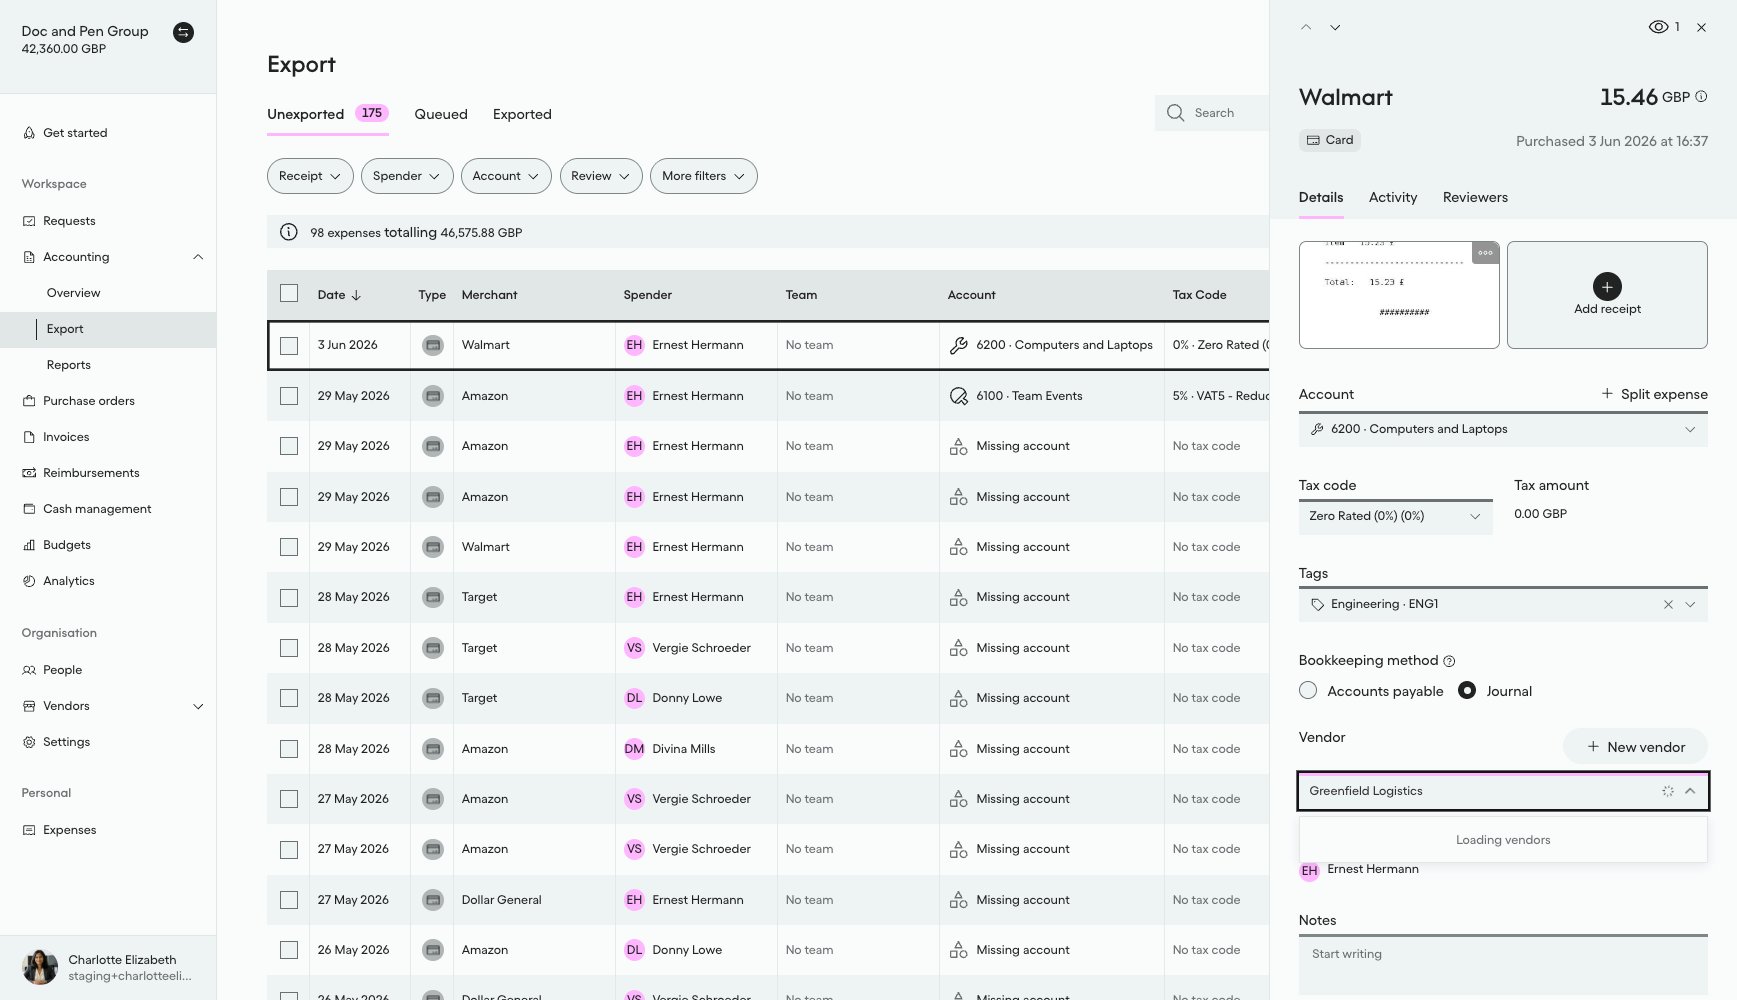
### 1. Verify that the Vendor doesn't already exist
1. Select **Accounting** from the main left-hand navigation.
2. Select **Export** from the sub-menu.
3. Click on a row to open the details panel for that expense.
4. Select the **Vendor** drop-down menu and type "Greenfield Logistics" to search.
5. The Vendor field returns no search results, confirming the Vendor doesn't already exist.
### 2. Create the new Vendor
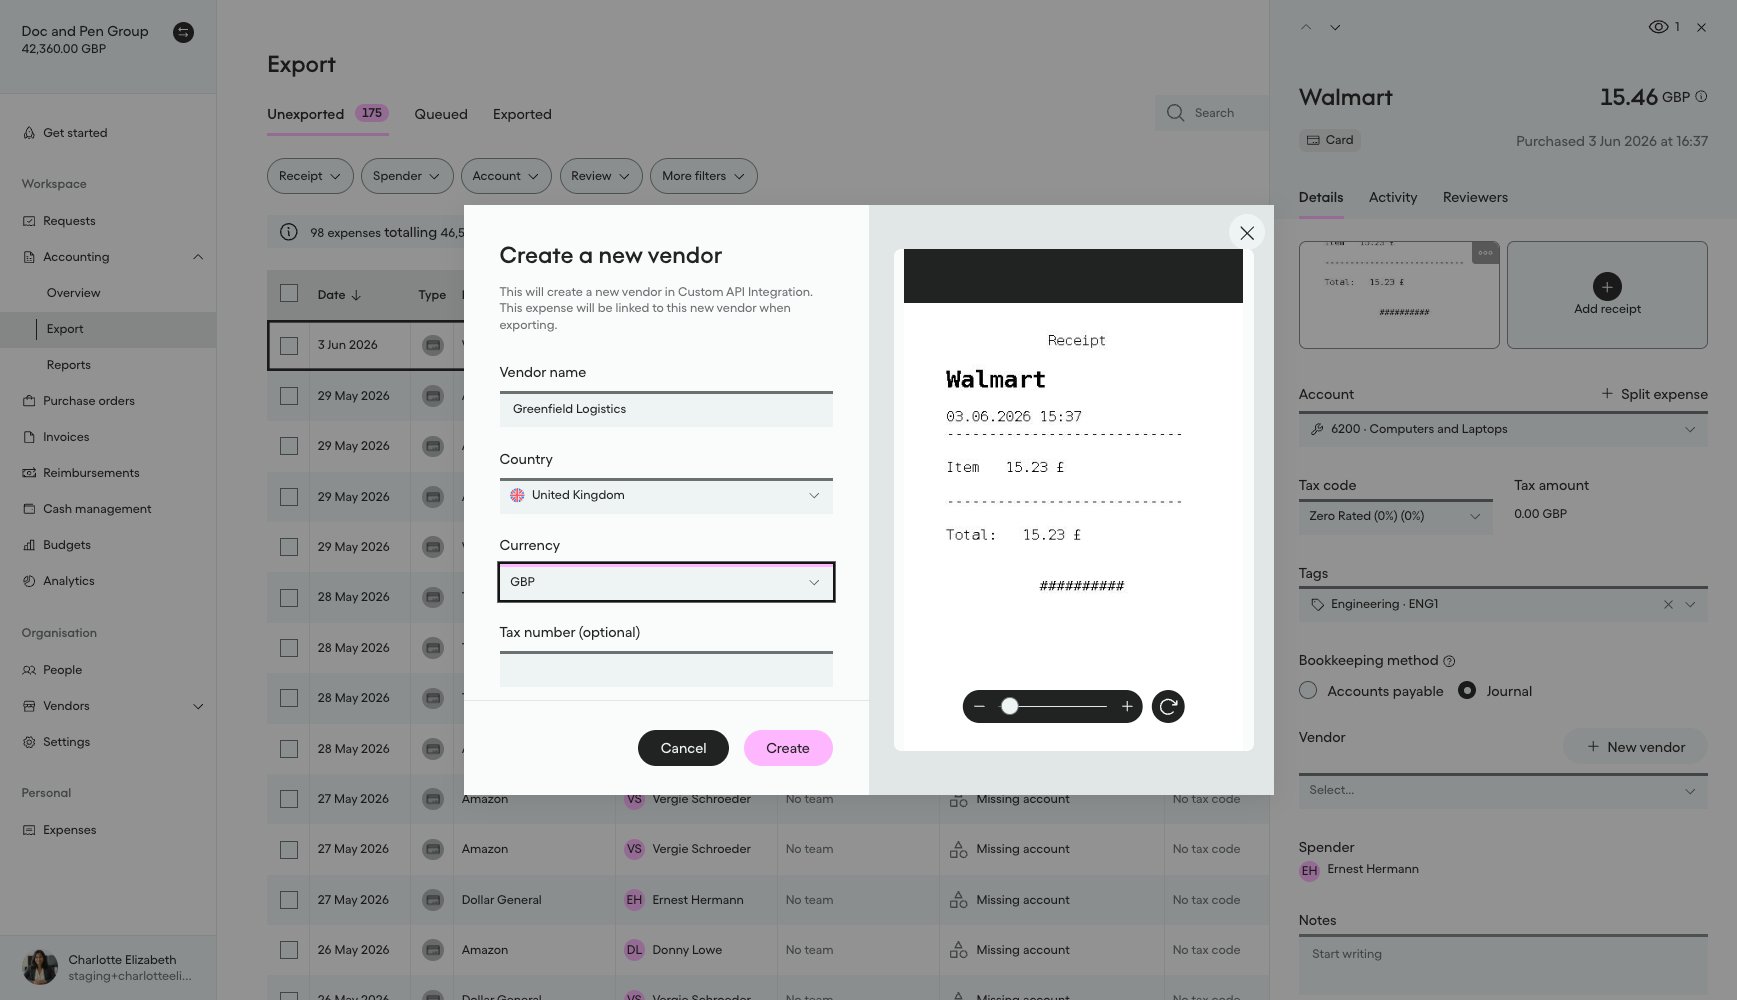
1. Click the **+ Create a new vendor** option inside the drop-down field, or click the **+ New vendor** button above the Vendor field.
2. The **Create a new vendor** modal opens.
3. Fill in the Vendor's details, such as name, country, currency, and optionally a tax number and registration number.
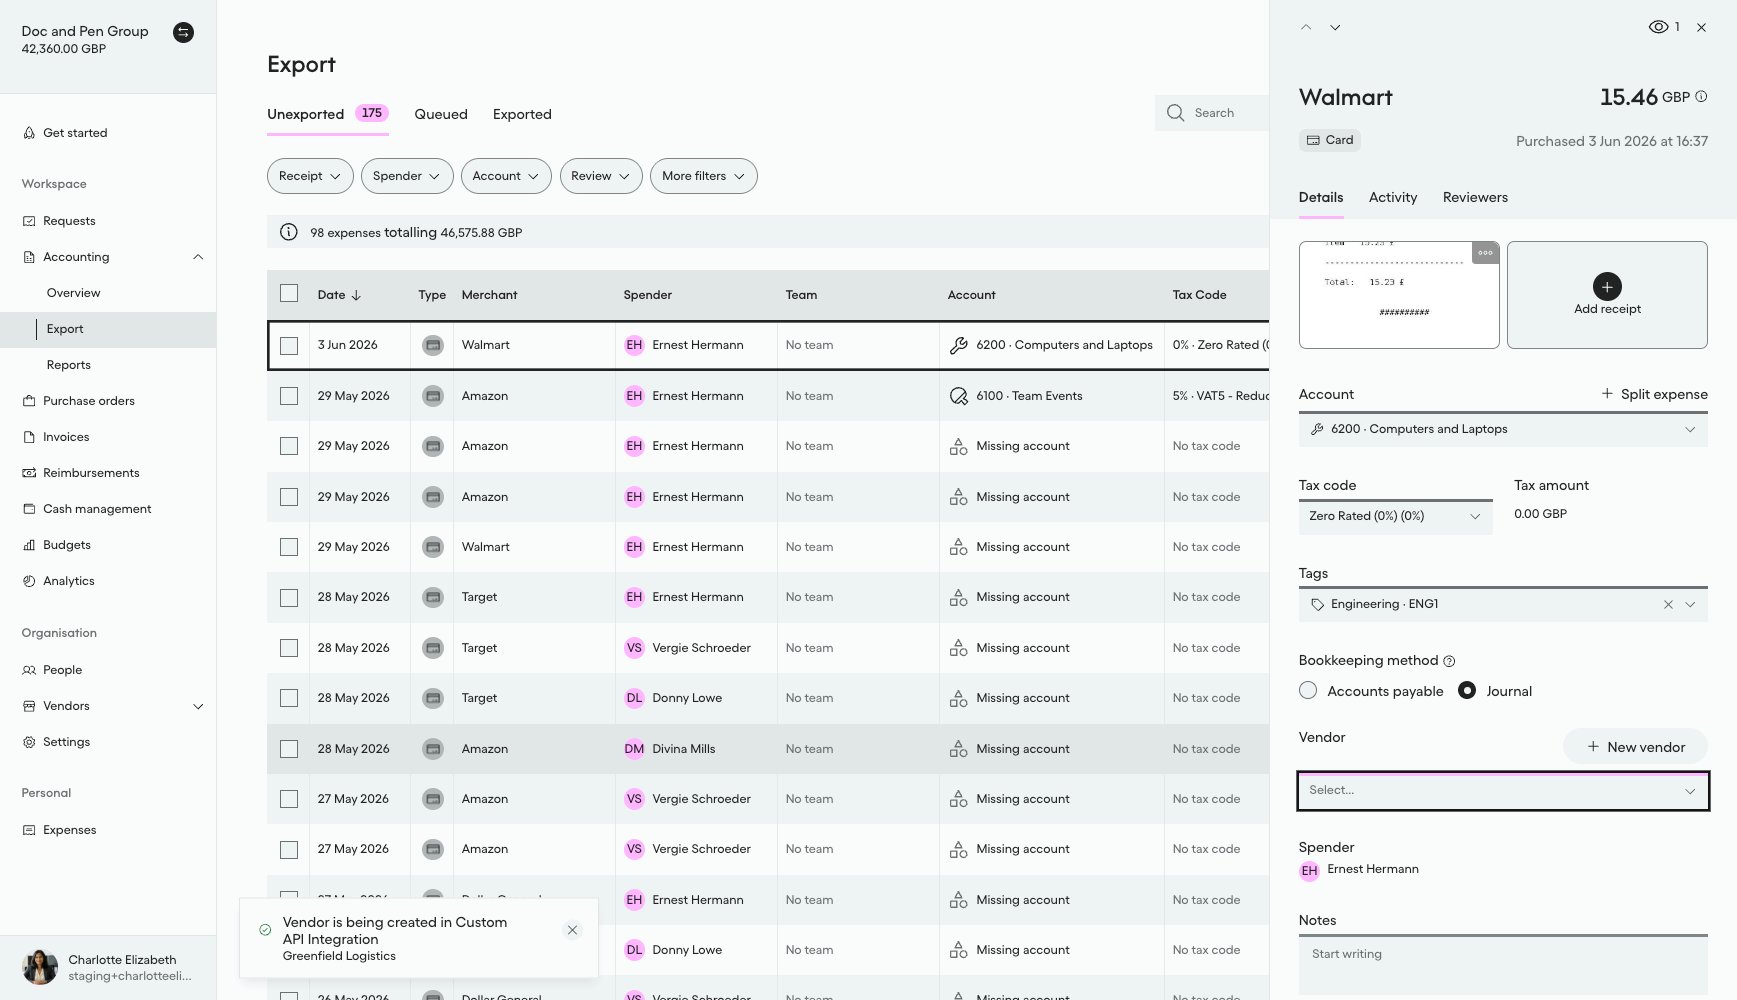
4. Click **Create**.
A notification confirms the vendor is being created in the Accounting System:
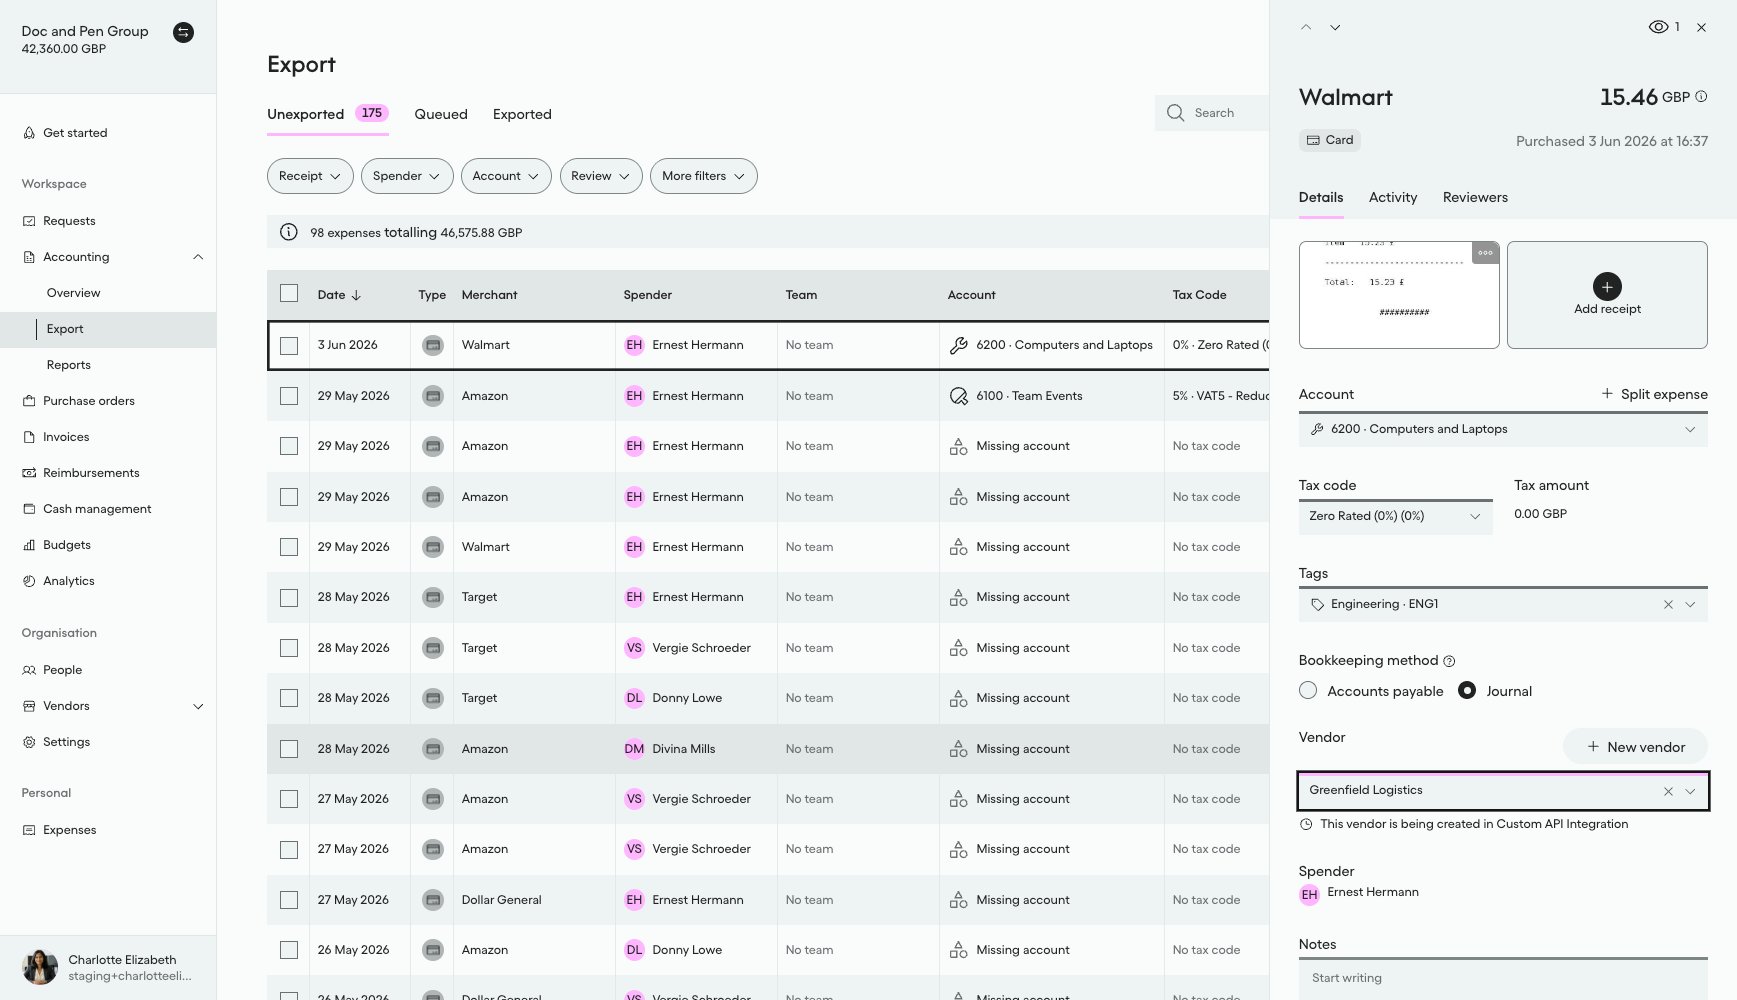
"Greenfield Logistics" is now selected on the expense, with a note below the Vendor field confirming the vendor is still being created:
***
## Result
After this action:
* A new Vendor exists in Pleo with `state: DRAFT`
* Its `name`, `country`, `defaultCurrency`, `registrationNumber`, and `taxRegistrationNumber` are set from what the bookkeeper entered
* It has no `code` or `externalId` yet, those are assigned once your integration creates the record in the Accounting System and activates it
* A `v1.vendor.created` webhook event has been emitted for it
***
## What Comes Next?
How to Detect Draft Vendors
***
this how-to is part of:
***
## Related Reading
* [How to Detect Draft Vendors](/docs/current/how-tos/accounting-integrations/vendors/how-to-detect-draft-vendors)
* [Platform Capabilities: Vendor Creation](/docs/current/platform/exports/vendors/vendor-creation-overview)
***