> ## Documentation Index
> Fetch the complete documentation index at: https://developers.pleo.io/llms.txt
> Use this file to discover all available pages before exploring further.

# How to Make an API Call Using a Standalone API Key (Postman)

export const WhatComesNext = ({children, href}) => <div className="mt-4">
    <a href={href} className="
        inline-flex items-center justify-center
        rounded-full
        bg-black text-white dark:bg-[#1f262b]
        px-5 py-2.5 text-sm font-medium
        no-underline border-0
        hover:bg-[#ffe6ea] dark:hover:bg-[#2b1f23]
        hover:text-black
        transition-colors
      ">
      {children} →
    </a>
  </div>;

export const RememberCallout = ({title, children, icon = "🪢"}) => <div style={{
  backgroundColor: 'var(--recommended-bg)',
  borderLeft: '4px solid #f63b92',
  borderRadius: '10px',
  padding: '18px 22px',
  marginBottom: '20px',
  boxShadow: '1px 1px 3px rgba(0,0,0,0.06)'
}}>
    <div style={{
  display: 'flex',
  alignItems: 'flex-start',
  gap: '14px'
}}>
      <span style={{
  fontSize: '22px',
  lineHeight: '1',
  flexShrink: 0
}}>
        {icon}
      </span>
      <div>
        {title && <div style={{
  fontSize: '16px',
  fontWeight: 600,
  color: 'var(--recommended-title)',
  marginBottom: '6px'
}}>
            {title}
          </div>}
        <div style={{
  fontSize: '14px',
  lineHeight: 1.65
}}>
          {children}
        </div>
      </div>
    </div>
  </div>;

This how-to covers making an API call using Standalone API Keys and **Postman**. For the full cURL instructions, where you use the command line, see the [How to Make an API Call Using a Standalone API Key](/docs/current/how-tos/api-keys/how-to-make-an-api-call-using-standalone-api-keys) instead.

## Prerequisites

Before you begin:

* You have [generated a Standalone API Key](/docs/current/how-tos/api-keys/how-to-generate-standalone-api-keys)

## Steps

### 1. Create an HTTP Request

In your Postman collection:

1. Click **New** and then select **HTTP Request**
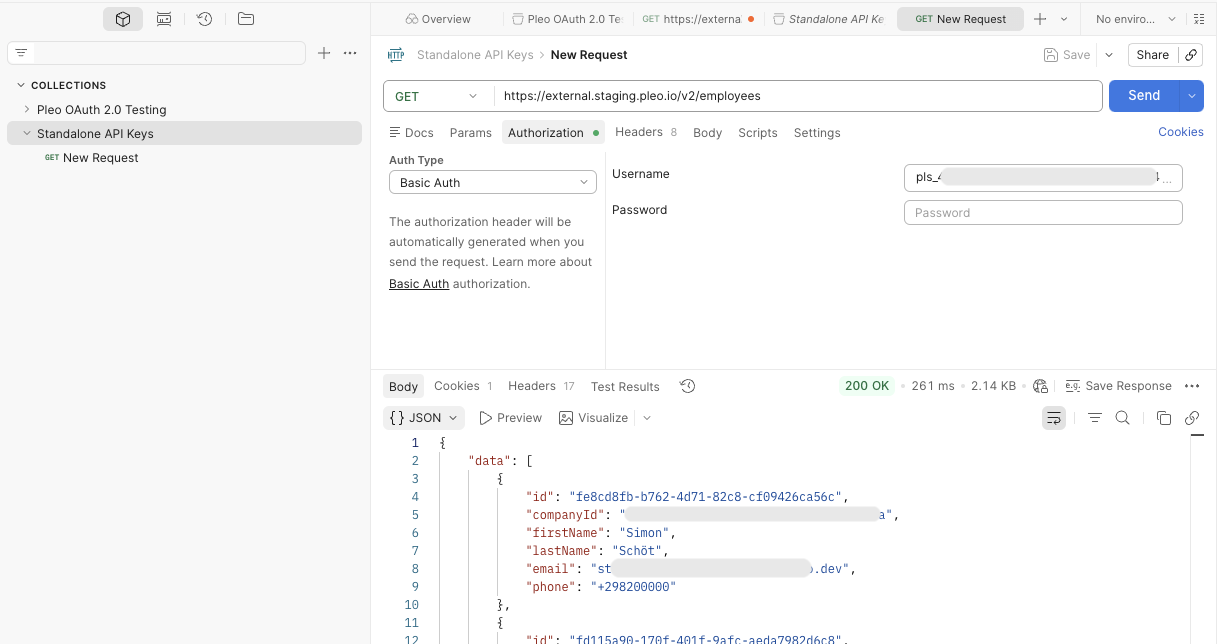
2. Ensure that the HTTP method corresponds to the endpoint being called, for example: `GET`
3. Enter the **Staging URL** for the Pleo API you want to test, for example: `https://external.staging.pleo.io/v2/employees`

<div style={{ textAlign: "center" }}>
  <img src="https://mintcdn.com/pleo-61d4d38b/_rkxCoO48Dr_L3ku/images/current/standalone-api-keys/standalone-api-keys-postman-new-request.png?fit=max&auto=format&n=_rkxCoO48Dr_L3ku&q=85&s=62034892e26e0051f8d6a7beaa92f601" alt="Postman GET HTTP Request" width="100%" style={{ display: "block", margin: "0 auto" }} data-path="images/current/standalone-api-keys/standalone-api-keys-postman-new-request.png" />
</div>

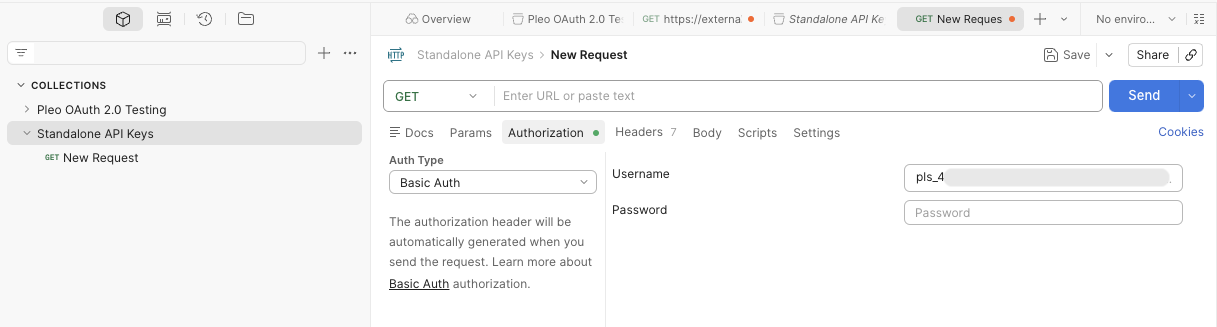
### 2. Add Authorisation

1. Click the **Authorization** tab
2. Select **Basic Auth** as the **Auth Type**
3. Enter your **Standalone API Key** as the **Username**
4. Leave the **Password** field blank

<div style={{ textAlign: "center" }}>
  <img src="https://mintcdn.com/pleo-61d4d38b/_rkxCoO48Dr_L3ku/images/current/standalone-api-keys/standalone-api-keys-postman-auth.png?fit=max&auto=format&n=_rkxCoO48Dr_L3ku&q=85&s=71cf509b7e1b3d3478e0c334e27ecce2" alt="Postman GET HTTP Request" width="100%" style={{ display: "block", margin: "0 auto" }} data-path="images/current/standalone-api-keys/standalone-api-keys-postman-auth.png" />
</div>

### 3. Send the Request

1. Click the **Send** button at the top of the screen
2. If everything is configured correctly, you should receive a JSON response

<div style={{ textAlign: "center" }}>
  <img src="https://mintcdn.com/pleo-61d4d38b/_rkxCoO48Dr_L3ku/images/current/standalone-api-keys/standalone-api-keys-postman-response.png?fit=max&auto=format&n=_rkxCoO48Dr_L3ku&q=85&s=93bd7e8e59acc753893d1fb449bccef1" alt="Postman GET HTTP Response" width="100%" style={{ display: "block", margin: "0 auto" }} data-path="images/current/standalone-api-keys/standalone-api-keys-postman-response.png" />
</div>

## Result

After completing these steps:

* You have successfully made a Pleo API call using Standalone API Keys in Postman

***

## What Comes Next?

<WhatComesNext href="/docs/current/guides/standalone-api-keys-workflow-guide">
  Go back to guide
</WhatComesNext>

***

<div className="text-xs uppercase" style={{ fontVariant: 'small-caps' }}>
  this how-to is part of:
</div>

<div className="mt-4 flex flex-wrap gap-2">
  <a
    href="/docs/current/guides/standalone-api-keys-workflow-guide"
    className="inline-flex items-center rounded-full border border-gray-300 dark:border-gray-600 
px-3 py-1 text-xs font-medium 
bg-white dark:bg-[#1f262b] text-black dark:text-white
hover:bg-gray-100 dark:hover:bg-[#2b2f33]
transition-colors"
  >
    Standalone API Key Workflow Guide
  </a>
</div>

***

## Related Reading

* [OAuth 2.0 Setup with Postman Workflow Guide](/docs/current/guides/oauth-workflow-guide-postman): Step-by-step instructions on how to configure OAuth 2.0 where Postman handles the full token lifecycle.

***
