> ## Documentation Index
> Fetch the complete documentation index at: https://developers.pleo.io/llms.txt
> Use this file to discover all available pages before exploring further.

# How to Configure Postman for OAuth 2.0

export const WhatComesNext = ({children, href}) => <div className="mt-4">
    <a href={href} className="
        inline-flex items-center justify-center
        rounded-full
        bg-black text-white dark:bg-[#1f262b]
        px-5 py-2.5 text-sm font-medium
        no-underline border-0
        hover:bg-[#ffe6ea] dark:hover:bg-[#2b1f23]
        hover:text-black
        transition-colors
      ">
      {children} →
    </a>
  </div>;

Configuring Postman with your OAuth 2.0 details allow you to test Pleo API endpoints, whilst leaving the token lifecycle management to Postman.

## Prerequisites

* You have completed Pleo's [registration process](/docs/current/how-tos/oauth-postman/how-to-register-an-oauth-client-postman)
* You have received your **Client ID** and **Client Secret** from Pleo
* You have logged into Postman and have created a collection

## Steps

### 1. Configure a new token

1. Open your Postman collection
2. Click the **Authorization** tab
3. Select **OAuth 2.0** as the **Auth Type**

<div style={{ textAlign: "center" }}>
  <img src="https://mintcdn.com/pleo-61d4d38b/rw-misT-UerICD29/images/current/oauth-postman/oauth-postman-auth-tab.png?fit=max&auto=format&n=rw-misT-UerICD29&q=85&s=a65b4a45f50c2f126b14fab7b72fd48a" alt="Pleo video coming soon." width="100%" style={{ display: "block", margin: "0 auto" }} data-path="images/current/oauth-postman/oauth-postman-auth-tab.png" />
</div>

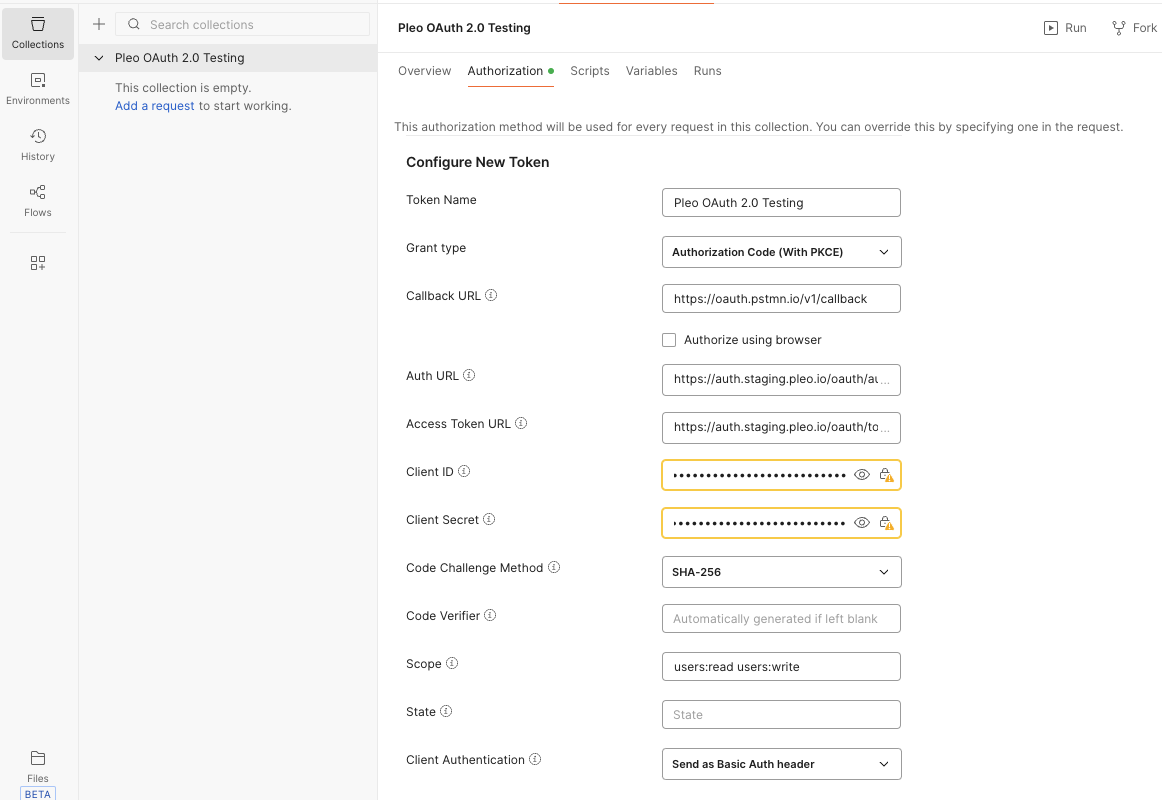
4. Scroll to the **Configure New Token** section
5. Provide the following configuration:

| Parameter             | Configuration                                                                                                                                                                          |
| :-------------------- | :------------------------------------------------------------------------------------------------------------------------------------------------------------------------------------- |
| Grant type            | Authorization Code (With PKCE)                                                                                                                                                         |
| Callback URL          | The Postman redirect endpoint URIs you [registered](/docs/current/how-tos/oauth-postman/how-to-register-an-oauth-client-postman)                                                       |
| Auth URL              | [`{AUTHORIZATION_SERVER_URL}/oauth/authorize`](/docs/current/integration-design/auth/oauth/getting-set-up/oauth-client-configuration#authorisation-server-urls)                        |
| Access Token URL      | [`{AUTHORIZATION_SERVER_URL}/oauth/token`](/docs/current/integration-design/auth/oauth/getting-set-up/oauth-client-configuration#authorisation-server-urls)                            |
| Client ID             | Client ID you received after [registration](/docs/current/how-tos/oauth-postman/how-to-register-an-oauth-client-postman)                                                               |
| Client Secret         | Client Secret you received after [registration](/docs/current/how-tos/oauth-postman/how-to-register-an-oauth-client-postman)                                                           |
| Code Challenge Method | `SHA-256`                                                                                                                                                                              |
| Code Verifier         | Leave blank, or provide a valid [PKCE code](/docs/current/integration-design/auth/oauth/implementing-oauth/integration-design-auth-oauth-pkce-and-secured-patterns) verifier.          |
| Scope                 | Enter space-delimited list of [API scopes](/docs/current/authentication/api-scopes) that you [registered](/docs/current/how-tos/oauth-postman/how-to-register-an-oauth-client-postman) |
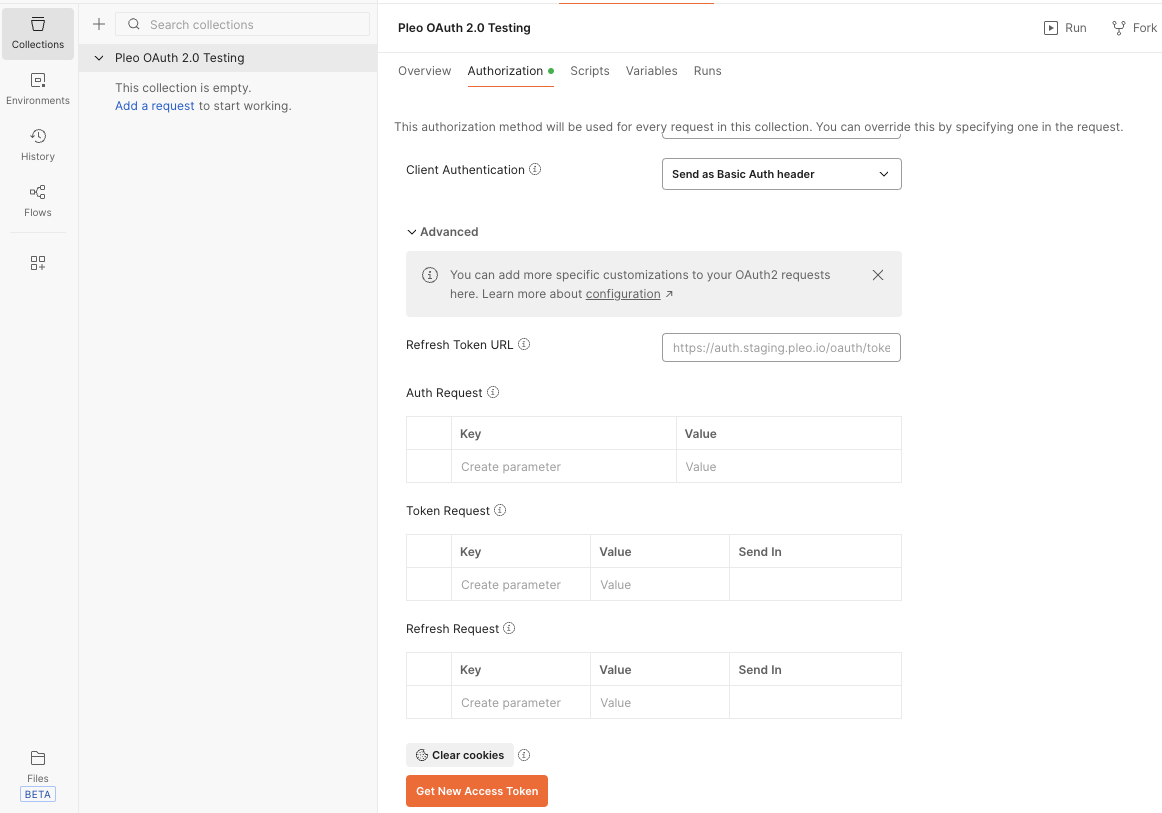
| Client Authentication | `Send as Basic Auth Header`                                                                                                                                                            |

<Info>
  We recommend using Postman environment variables to store the authorisation server base URL and client credentials. This allows you to quickly switch between staging and production environments.
</Info>

<div style={{ textAlign: "center" }}>
  <img src="https://mintcdn.com/pleo-61d4d38b/rw-misT-UerICD29/images/current/oauth-postman/oauth-postman-configure-new-token.png?fit=max&auto=format&n=rw-misT-UerICD29&q=85&s=d8ea9c39734e38a90bd0756531697025" alt="Pleo video coming soon." width="100%" style={{ display: "block", margin: "0 auto" }} data-path="images/current/oauth-postman/oauth-postman-configure-new-token.png" />
</div>

### 2. Get a new Access Token

1. Scroll down and click **Get New Access Token**.

<div style={{ textAlign: "center" }}>
  <img src="https://mintcdn.com/pleo-61d4d38b/rw-misT-UerICD29/images/current/oauth-postman/oauth-postman-get-new-access-token.png?fit=max&auto=format&n=rw-misT-UerICD29&q=85&s=a733d413444ae734e0b6cd946a04c063" alt="Pleo video coming soon." width="100%" style={{ display: "block", margin: "0 auto" }} data-path="images/current/oauth-postman/oauth-postman-get-new-access-token.png" />
</div>

2. A new browser window opens and redirects you to Pleo's authorisation server
3. Complete the authorisation process and grant access using your staging credentials
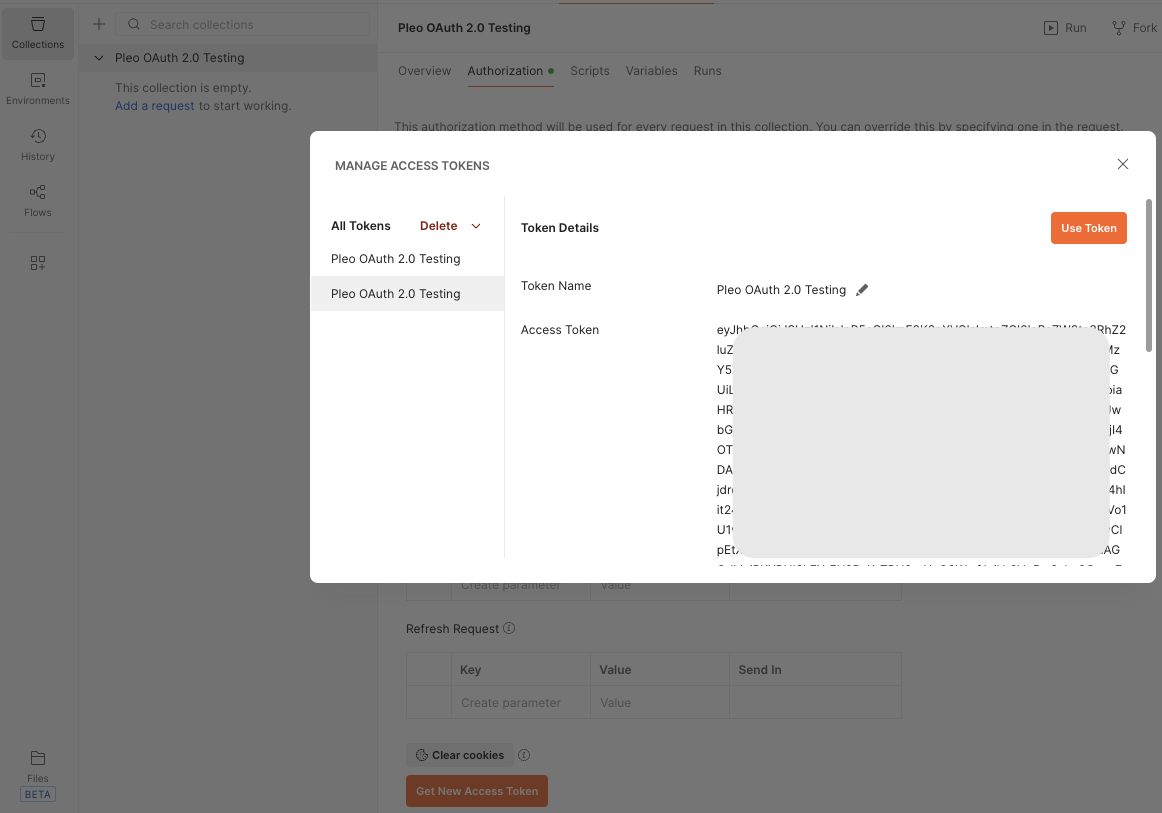
4. After authorisation, you are redirected back to Postman
5. Click **Use Token**

<div style={{ textAlign: "center" }}>
  <img src="https://mintcdn.com/pleo-61d4d38b/rw-misT-UerICD29/images/current/oauth-postman/oauth-postman-use-new-token.png?fit=max&auto=format&n=rw-misT-UerICD29&q=85&s=4f905ab6e41a54e01181cd08174b4bd5" alt="Pleo video coming soon." width="100%" style={{ display: "block", margin: "0 auto" }} data-path="images/current/oauth-postman/oauth-postman-use-new-token.png" />
</div>

<Note>
  Postman can automatically obtain new access tokens when existing tokens expire. Ensure the **Auto-refresh Token** toggle is enabled.
</Note>

## Result

* Postman is configured to authenticate with Pleo using OAuth 2.0
* You can make authenticated requests to Pleo's staging APIs
* Postman manages the access token lifecycle automatically

## What Comes Next?

<WhatComesNext href="/docs/current/how-tos/oauth-postman/how-to-make-an-api-call-postman">
  Make your first API call using Postman
</WhatComesNext>

***

<div className="text-xs uppercase" style={{ fontVariant: 'small-caps' }}>
  this how-to is part of:
</div>

<div className="mt-4 flex flex-wrap gap-2">
  <a
    href="/docs/current/guides/oauth-workflow-guide-postman"
    className="inline-flex items-center rounded-full border border-gray-300 dark:border-gray-600 
px-3 py-1 text-xs font-medium 
bg-white dark:bg-[#1f262b] text-black dark:text-white
hover:bg-gray-100 dark:hover:bg-[#2b2f33]
transition-colors"
  >
    OAuth 2.0 Setup with Postman Workflow Guide
  </a>
</div>

***

## Related Reading

* [OAuth 2.0 Setup Workflow Guide](/docs/current/guides/oauth-workflow-guide)

  Step-by-step instructions on how to configure OAuth 2.0 where you handle the full token lifecycle

***
