

- Accounts Mapping uses the accounting settings.
- Tags Sync: Dimension Selection uses the dimension selection.
- Accounting Periods uses closed period handling.
- Posting Behaviour uses auto-posting.
Implementation
- Export Integration Workflow Guide: workflow context for the Level 1 export, which depends on these settings
Settings Overview
Connection Parameters
Essential, if the Accounting System requires them. Some Accounting Systems need extra information after the connection is made. Examples are a subsidiary or an environment. Your integration must know these values before it imports data such as the chart of accounts, tax codes and Tags. If your Accounting System needs post-connection parameters, you must expose a dedicated configuration for them.- Show a drop-down to select the subsidiary, if it applies.
- Show a drop-down to select the environment, if it applies.
- Add any other setting your Accounting System needs.
Accounting Settings
Essential. Accounting settings tell your integration where to record each type of expense. They support card expenses, out-of-pocket expenses and their reimbursements, and invoices from Pleo’s Invoice product. Split the settings into two clearly labelled sections. Give each section a title and a short statement of its purpose.Global Accounting Settings
Global settings apply to all expense types. A common example is the journal setup.
If you offer separate journals, show the journal choice for each expense type inside the section for that type.
Expense-Specific Accounting Settings
Add one section for each group of expense types. Use these groups: card expenses, out-of-pocket expenses with their reimbursements, and invoices. The settings in each section depend on your Accounting System. The following list is not complete.- Journal mapping
- Account mapping
- Employee account mapping, if it applies
- Vendor mapping, if it applies
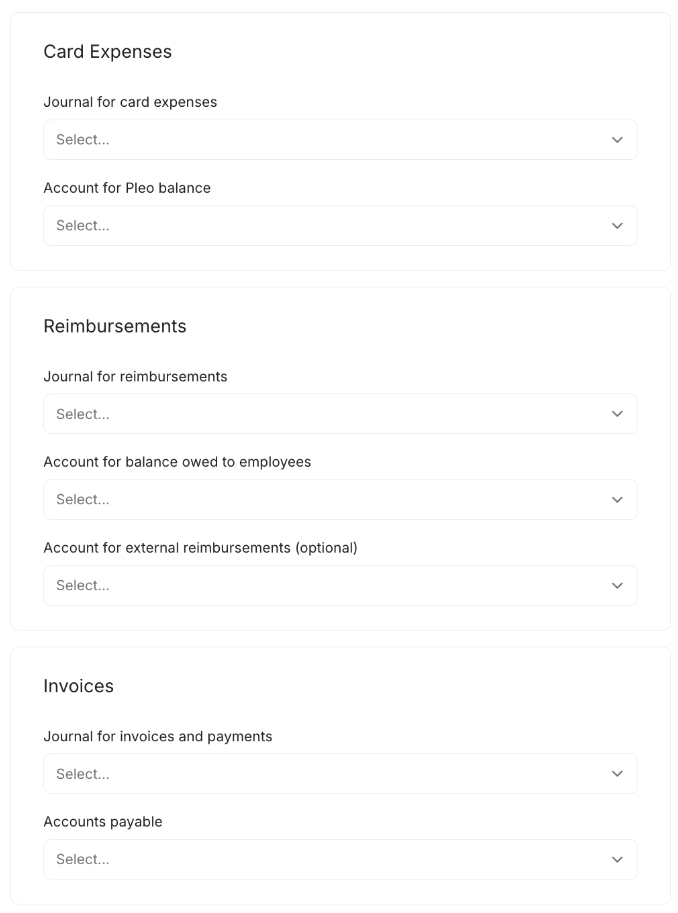
Visual example of expense-specific accounting settings.
The names above come from the settings screen. Accounts Mapping uses these names for the same accounts:
The integration does not need a setting for the Contra account. A bookkeeper or admin sets one Contra account for each currency in Pleo, and Pleo passes it in the Export Item.
Pleo does not send a Contra account for external reimbursements, because they are paid outside Pleo. The optional “Account for external reimbursements” setting is the account the integration uses to book them.
The selected accounts and journals feed Accounts Mapping. If a required value is missing when an Export Item is processed, the integration must fail that item with
failureReasonType set to missing_configuration.
Usability Requirements
Make the setup easy to complete, so users avoid mistakes. Apply these rules to every setting on this page.- Use short, clear labels.
- Add a tooltip or help text that explains each setting.
- Validate the input, so users cannot save an invalid configuration.
- Let users save a configuration and reuse it.
- Use a drop-down wherever possible, so users select a value instead of typing it.
Dimension Selection
Essential. Users must choose which Accounting Dimensions the integration imports as Tag Groups in Pleo. The integration must show only the available and active Dimensions for the connected company. Use a toggle for each Dimension if the Accounting System has five or fewer static Dimensions. Use up to five drop-downs if Dimensions are custom or there are more than five static Dimensions. For example, with a few static Dimensions, show one toggle for each Dimension.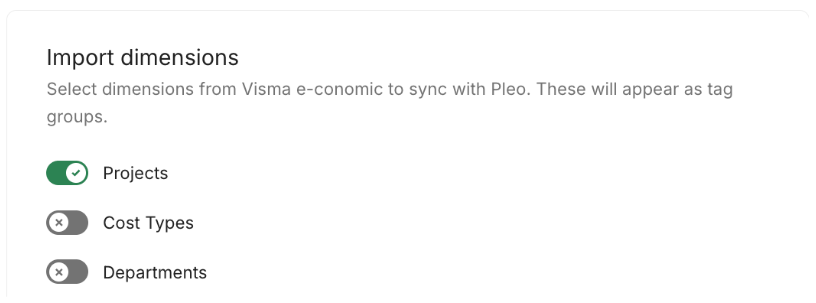
Visual example of Dimension selection with toggles.
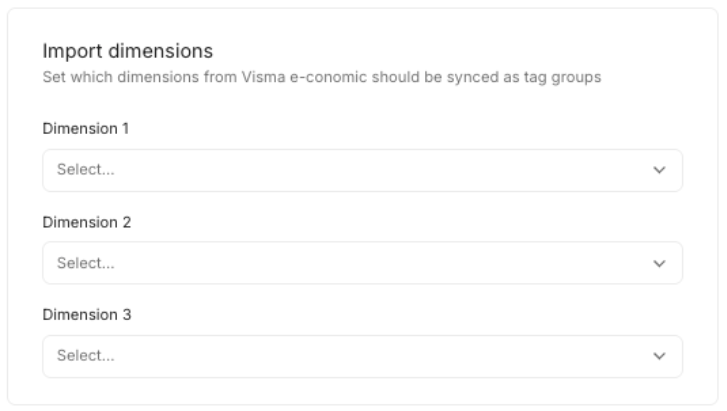
Visual example of Dimension selection with drop-downs.
Closed Period Handling
Essential, if your integration supports posting expenses to the next open period. Bookkeepers need to export expenses that fall in a closed accounting period without reopening the period. Your integration decides whether it can post such expenses to the next open period. If it can, provide a toggle that lets bookkeepers opt in or out. If it can’t, you don’t need this setting.- Give the toggle a clear title and a short description. A suitable title is “Expense rollover”.
- Explain in the description what happens when the original expense date falls in a closed period. For example, the integration pushes the expense to the next open period.
- When the toggle is off, the integration posts with the original date. If the Accounting System rejects it, the integration fails the Export Item with a clear error.
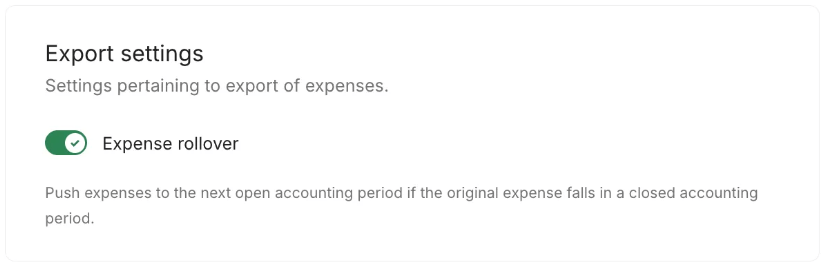
Visual example of the closed period toggle.
Auto-Posting
Optional. Provide a setting that lets bookkeepers choose whether the integration creates entries as finalised (posted) or leaves them as drafts. Auto-posting reduces the manual work of moving each entry to its final state. If the bookkeeper has not set it, or your integration cannot tell what they chose, create entries as drafts. Posting Behaviour describes how to map this setting to the posting states of your Accounting System.Custom Description
Optional. Provide a setting that lets bookkeepers build the description attached to each entry. A clear description gives them the context they need when they review entries in the Accounting System. Let users combine the following elements.- Static text
- The order of the fields
- Data fields from the Export Item, such as the note, the employee name, the vendor name, the original currency or the supplier currency
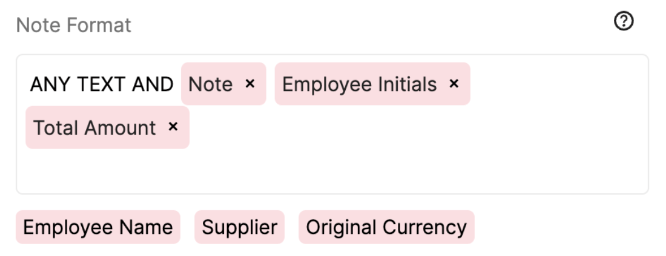
Visual example of a custom description editor.
Custom Data Fields
Optional. Some Accounting Systems have fields on an entry that are separate from the description. A common example is a reference field. Bookkeepers use these fields to attach extra information that fits how they work, such as an identifier they later search for or report on. If your Accounting System has such fields, provide a setting that lets bookkeepers choose which Pleo data the integration sends to each one.How It Differs from Custom Description
The custom description is one free-text field. Bookkeepers build it from static text and data fields. A custom data field is a separate field in the Accounting System. The bookkeeper chooses what to send to each field on its own, so each field can hold a different piece of data.What to Build
- Show the fields of your Accounting System that the integration can write to.
- For each field, let the bookkeeper choose a data field from the Export Item. Offer the same data fields as for the custom description, such as the note, the employee name, the vendor name, the original currency or the supplier currency.
- Make every field optional. A bookkeeper does not have to fill them all.
- If your Accounting System has fields at both the entry level and the line level, show which level each field belongs to.
- Check the length and format limits of each field in your Accounting System, and validate the choice before the bookkeeper saves it.
Example: SAP Business One
A journal entry in SAP Business One has reference fields, called Ref. 1, Ref. 2 and Ref. 3, in addition to its remarks. Users fill them with extra information about a posting, such as an invoice number. The fields help with tracing and analysing bookings, and they can appear in reports. For an integration with SAP Business One, the setting could look like this.
With this setup, a bookkeeper can find all entries for one vendor by searching on Ref. 1. This table is an example only. The data that bookkeepers can choose depends on your integration and your Accounting System.
Use the same approach as for the custom description, so users configure all text fields in one way.