Supported features
SCIM provisioning through a supported integration with IDPs, HR systems, or a custom integration through the API support the following operations:- Create Users: Creates or links a user in Pleo when assigning the app to a user in Okta. The default
userNameused to create accounts is set toEmail. A link is created instead of creating a new User if a Pleo User already exist withuserNameas their email. - Update the
userNameof a user: See limitations for more information on this flow. Updates to other fields are not supported. - Deactivate Users: Deactivates a user’s Pleo account when it is unassigned in Okta or their Okta account is deactivated. Accounts can be reactivated if the app is reassigned to a user in Okta.
Requirements
To be able to manage user access to Pleo through the Okta SCIM integrations, you need to be on the right subscription plan.🏳 User Provisioning through SCIM is available on the Advanced plan.
📨 Users added through SCIM are billable as soon as they accept an invite and sign in for the first time. The cost of new accounts will be prorated for the remainder of your current billing period.
Configuration steps
Follow the steps below to enable SCIM user provisioning through Okta.Step 1
Enable provisioning through SCIM in the General settings tab.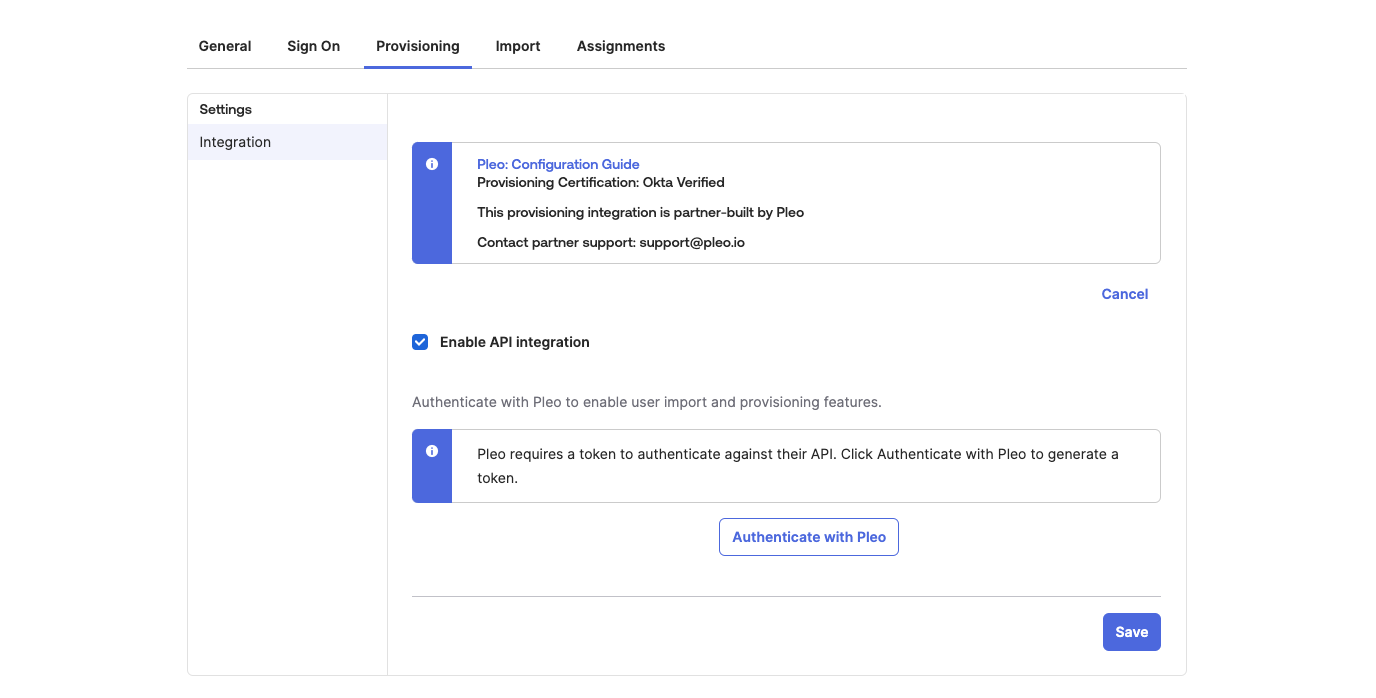
Step 2
Select Email for the Application username format on the Sign On application tab in Okta.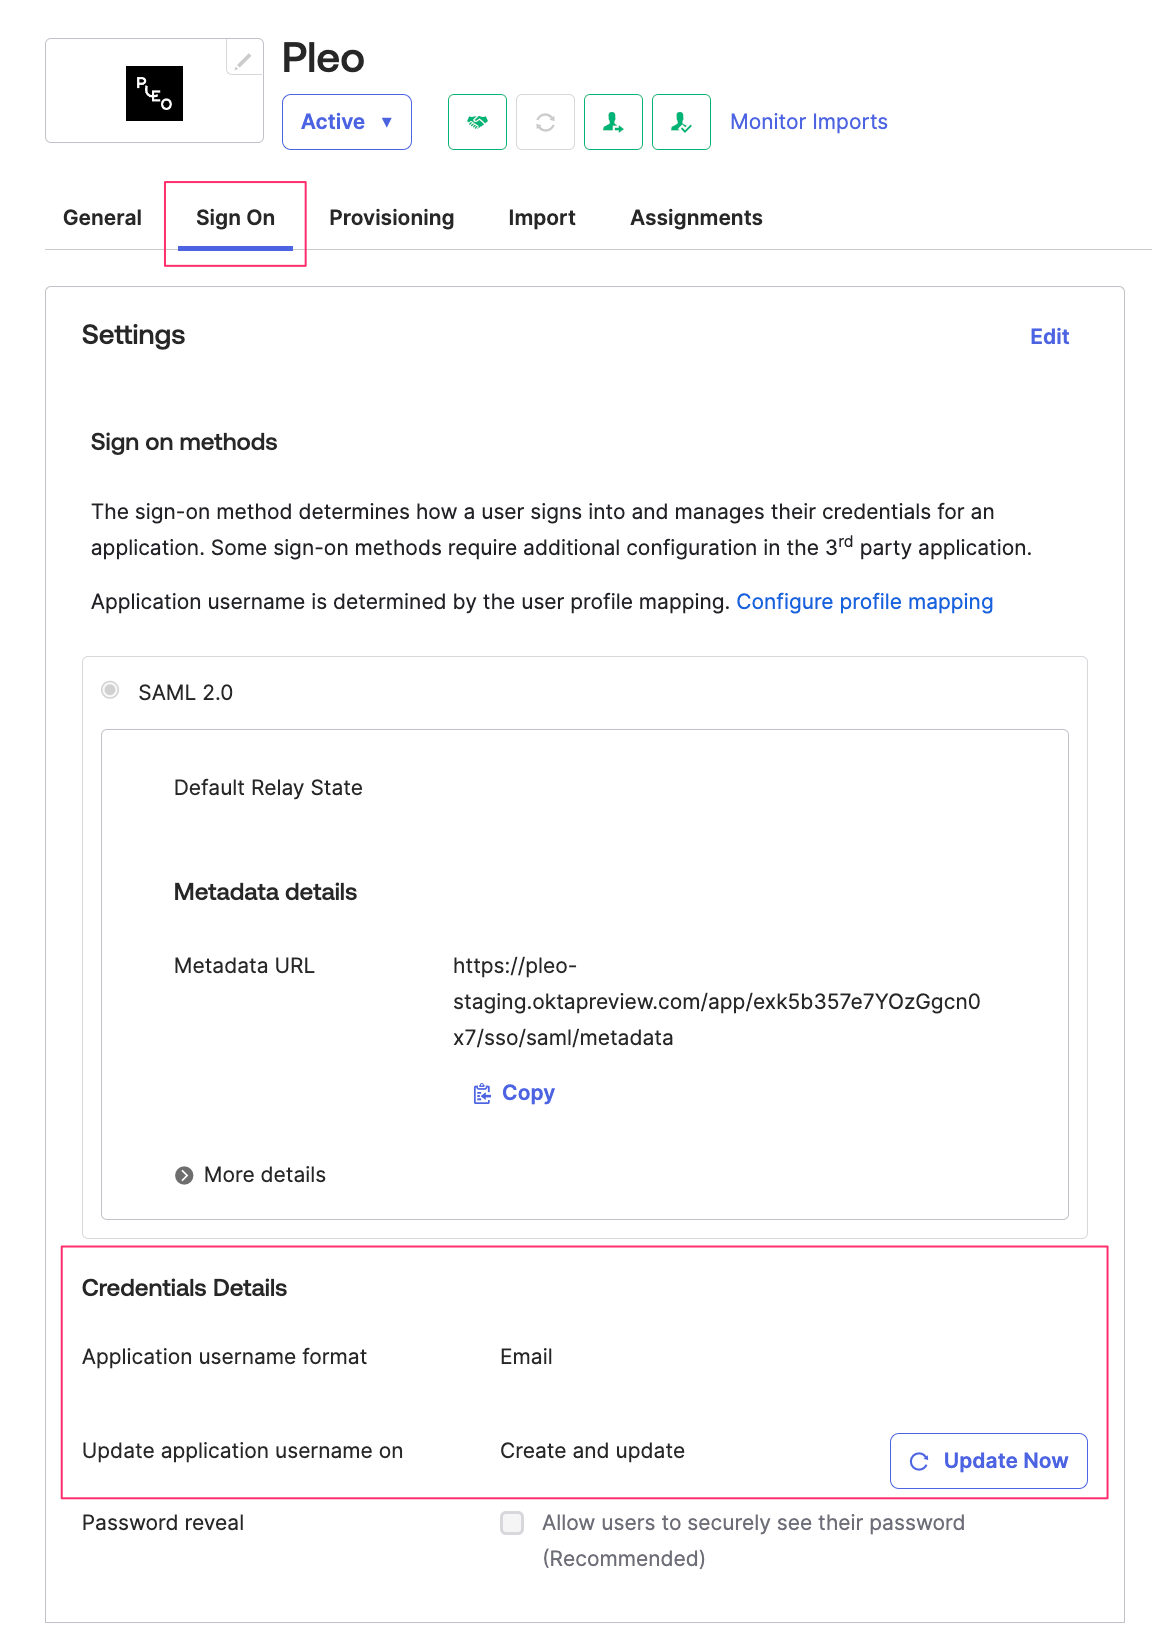
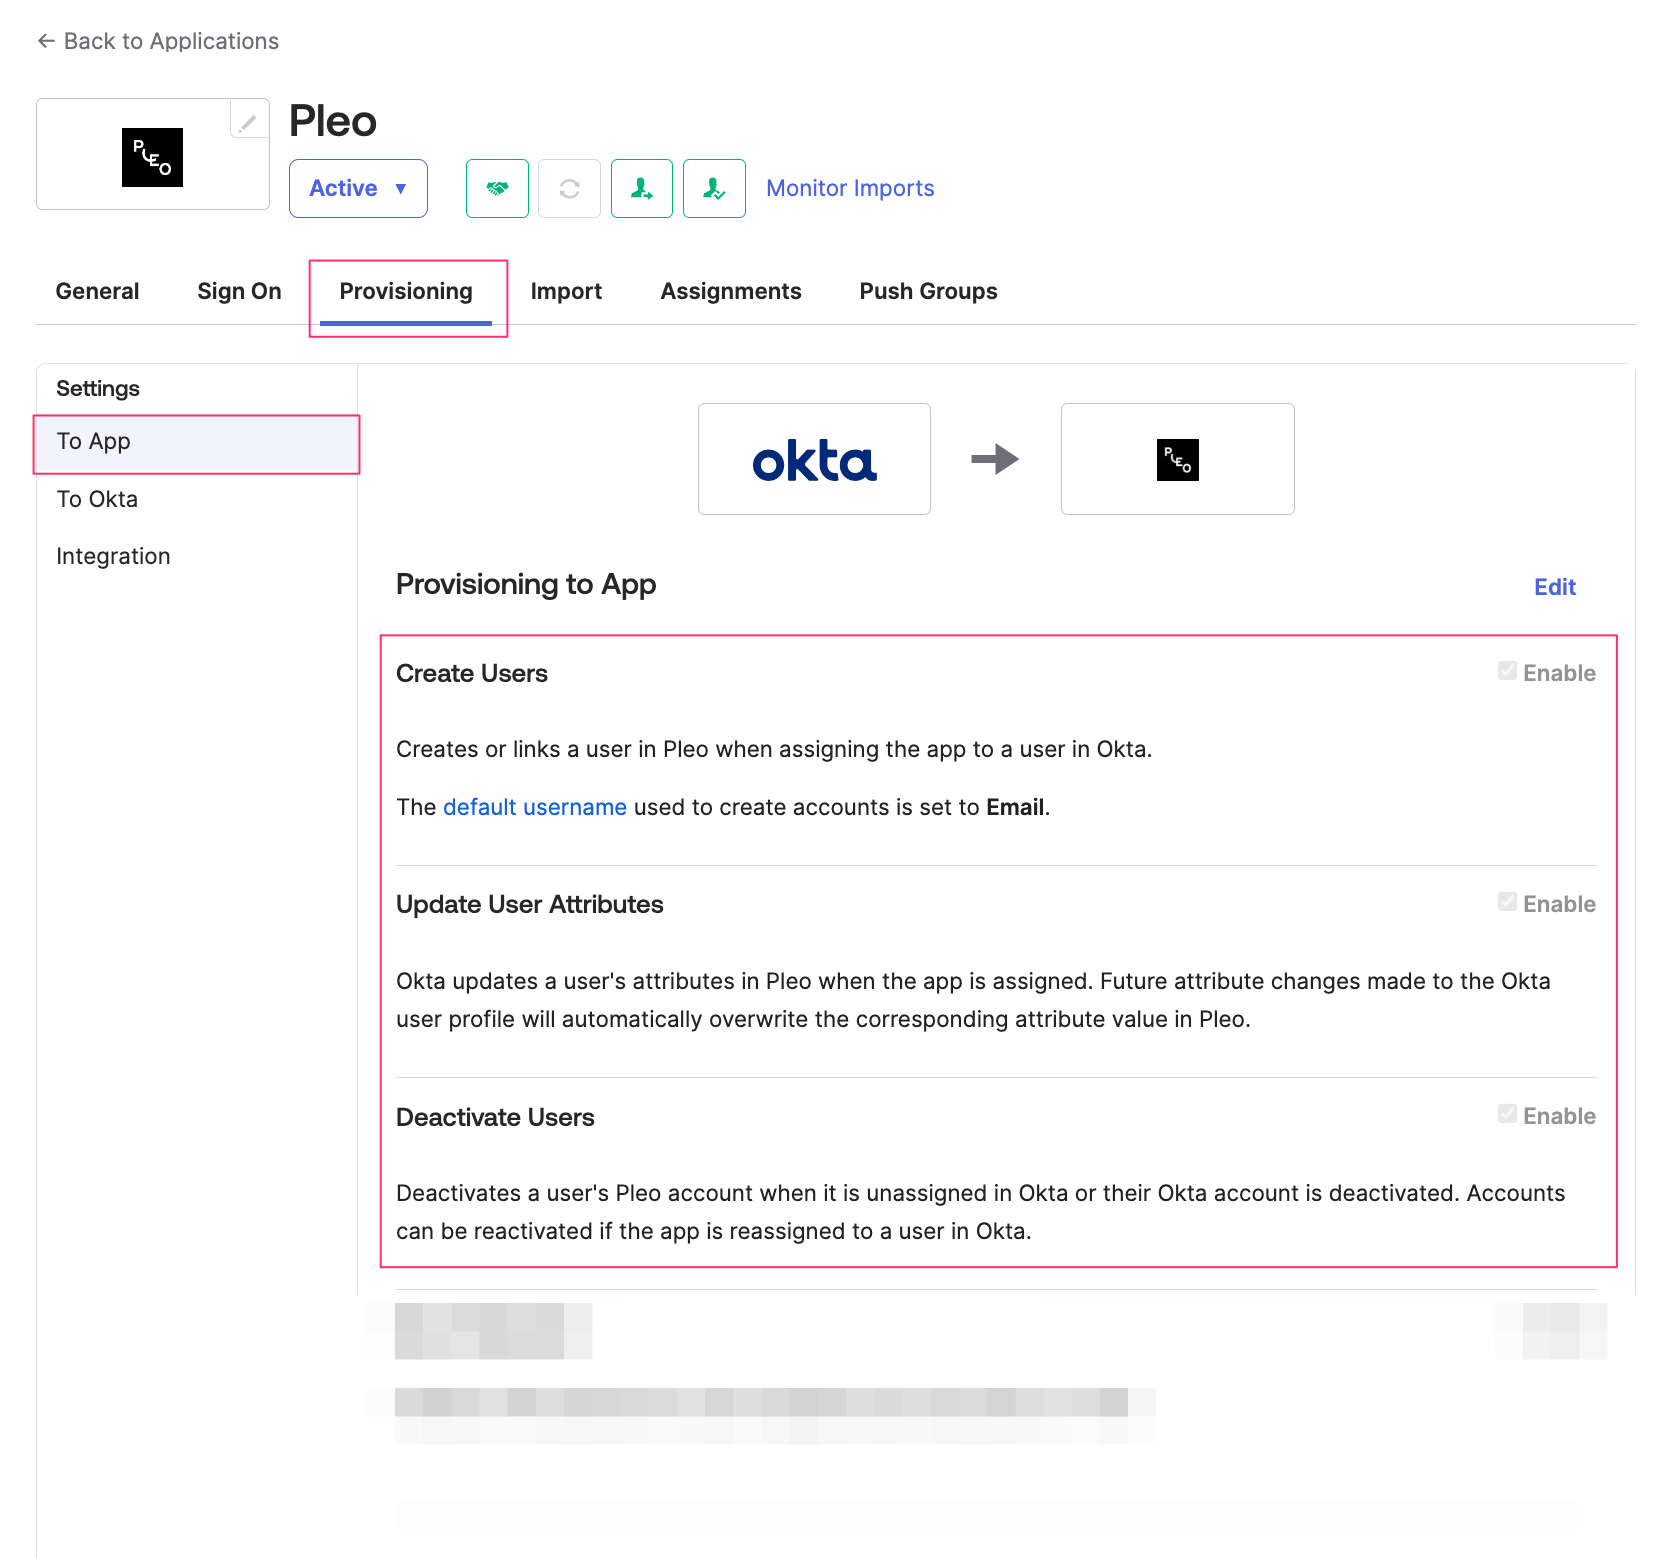
Step 3
Enable the following operations in the Provisioning tab:- Create Users
- Update User Attributes
- Deactivate Users
Step 4
After assigning Users to Pleo, they still have to be invited for them to start spending. When the users have been synced into Pleo, you can invite them to use Pleo:- Go to People
- Click Add people
- Select the Users you want to invite to Pleo
- For multi-entity set-up: Select the entity you want to add the user to
- Select the Card access,
- Card - User will only be able to spend with their Pleo card
- Card and Reimbursement - User can use their Pleo card and add out-of-pocket expenses
- Reimbursements only - User can only add out-of-pocket expenses
Limitations
- When performing an
userNameupdate, the email of the user in Pleo will not updated until the email is verified. This requires the user to click the verify link in the email sent to the new email address. - Simultaneous Provisioning Actions being triggered in Okta can cause the integration to stop working (for example, an HRIS system sending multiple de-provisioning requests to Okta at midnight). This will result in an “API not working” error in Okta and requires the integration to be re-authenticated (see Configuration Step 1).
- Currently we do not support Import Feature.