Quick Start
We currently only onboarding select pilot partners.
This guide will tell you how to connect the first user to your service from our platform. We’ll take you through:
- How to obtain your client credentials that will give you access to our platform
- How to generate a test account
- How to make your first request retrieve expense information
1. Getting credentials:
In order to begin building your OAuth solution, you will need client credentials. If you have an ongoing integration project with Pleo, your partner manager will provide you with this info.
If you do not have an active project, please reach out to [email protected]
You will be asked to provide:
- OAuth initiation url: this is where the user is taken when clicking the “connect” button to initiate the installation of the app. In the case of a an OAuth based integration, this is usually how the OAuth process is initiated. This is an application attribute
- Redirect url: this is where the user is taken to after completing the OAuth flow. This is an OAuth client attribute
- Settings url: this is where the user is taken to manage the integration or target system settings. This can lead to either the target system (for integrations as a module), or to the integration “middleware”. In case with middleware integrations, this can be the same as the initiationUrl. This is an application attribute.
2. Getting a demo company
This will be provided during the onboarding process.
3. Getting an Access Token
To start, you will need to obtain an access token for your demo company. This flow follows a typical OAuth flow, wherein a user needs to provide consent for accessing their Pleo data. To initiate the flow, make the following request via a browser:
[https://auth.staging.pleo.io/oauth/authorize](https://auth.pleo.io/oauth/authorize)?client_id=<client_id>&redirect_uri=<redirect_uri>&scope=<scopes>&response_type=code&state=<state>&code_challenge_method=S256&code_challenge=<code_challenge><client_id>: provided to you during app creation<redirect_uri>: an OAuth client attribute. This is where the user is taken to after completing the OAuth flow. Must match the value you provided during app creation<scope>: the list of scopes you have access to will be determined during the app creation process. Multiple scopes can be passed as a space-separated list, for example:scope=export:read export:write<response_type>: alwayscode<state>: a string value. Should be request-specific. Will be returned back by the server on future requests. This is optional.code_challenge_method: must beS256code_challenge: must be abase64uriencodedsha256hash of acode_verifier, a secret random string, that the client will need to present later during authorization code exchange. You MUST NOT exposecode_verifierduring authorization request.
This will prompt a login where you can provide your test credentials. After which, you will be given the opportunity to authorize your test application:
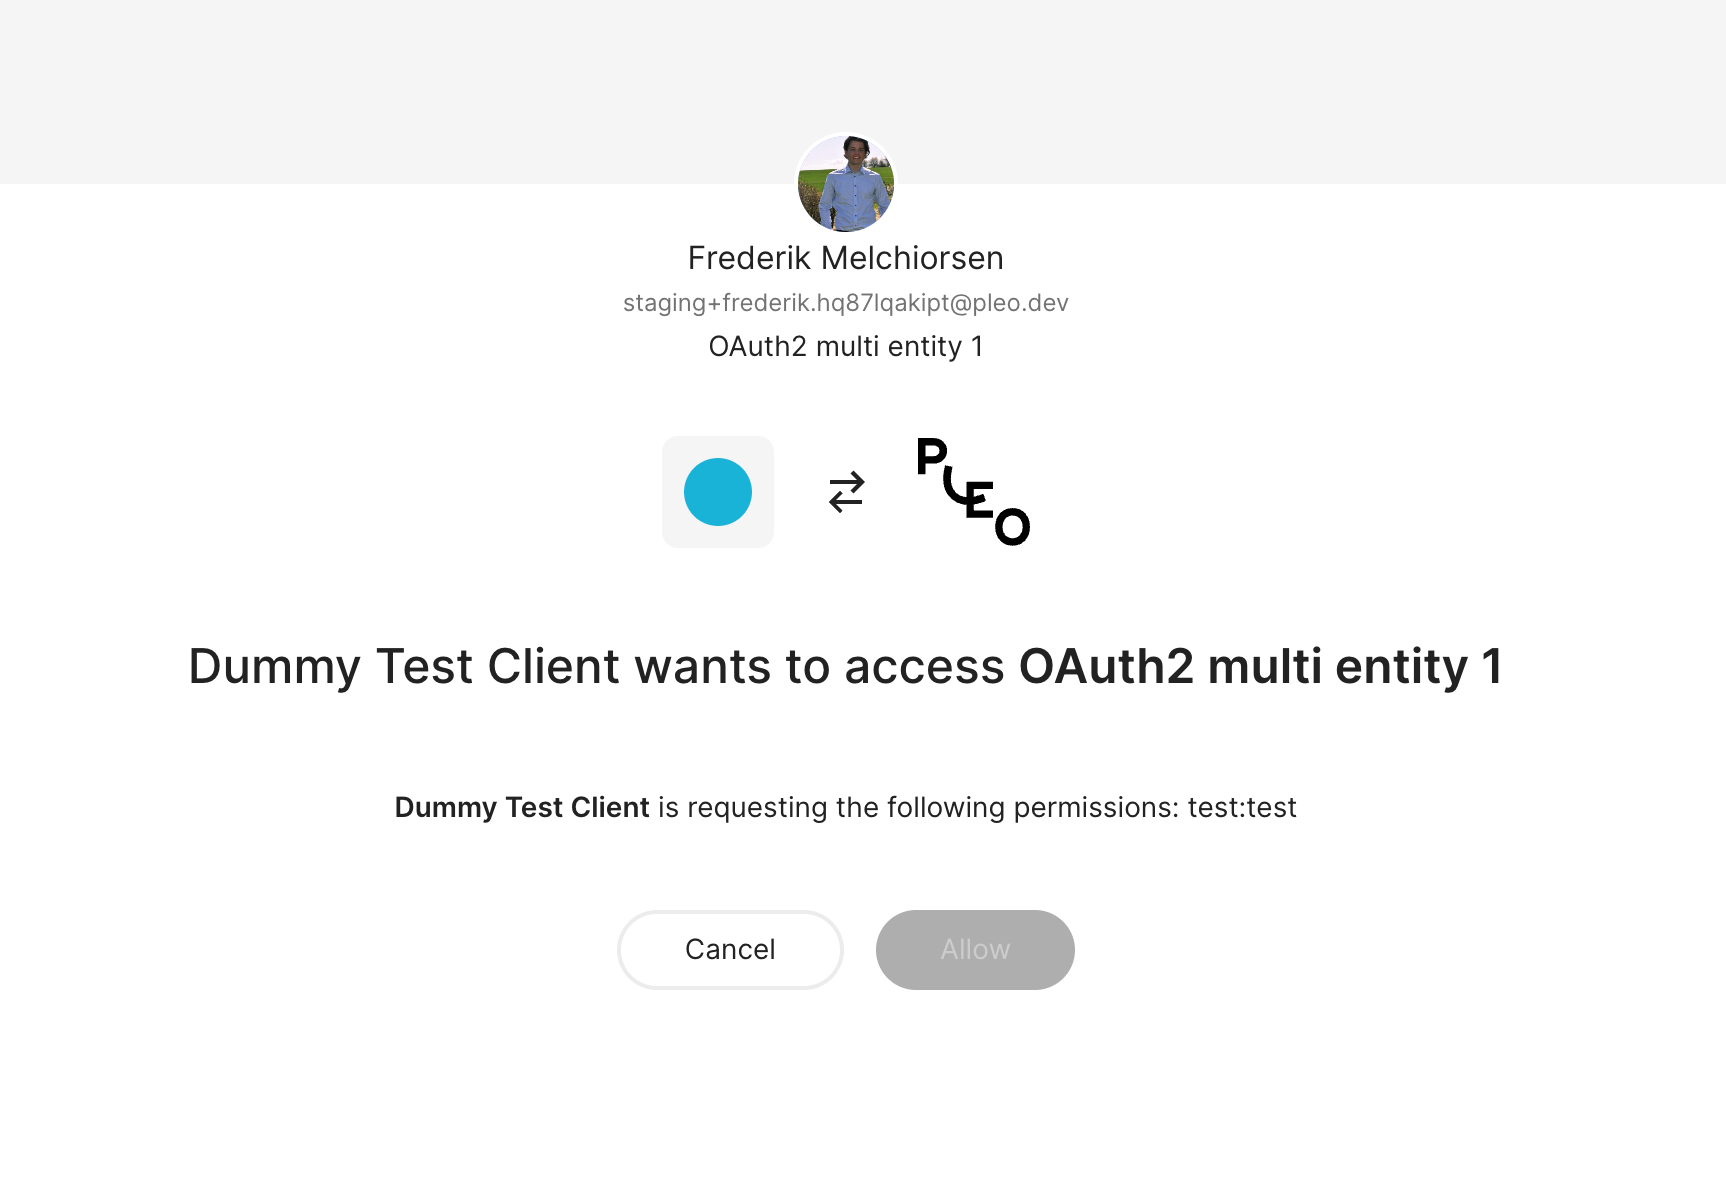
The resulting authorization code can then be used to obtain an access and refresh token
POST https://auth.staging.pleo.io/oauth/token

grant_type=authorization_code&
redirect_uri=${REDIRECT_URI}&
code=${THE_CODE_FROM_ABOVE}&
code_verifier=${SOME_STRING}
A successful response will look like:
{
  "access_token": "THE_ACCESS_TOKEN",
  "token_type": "Bearer",
  "expires_in": ACCESS_TOKEN_LIFETIME, // 10 mins.
  "refresh_token": "REFRESH_TOKEN",
  "scope": "scope1 scope2"
}
Store the access_token and refresh_token securely.
Once you have a refresh token, this can be used to continue obtain new short-lived access tokens:
POST https://auth.staging.pleo.io/oauth/token
grant_type=refresh_token&
refresh_token=xxxxxxxxxxx
You must present your client_id and client_secret using Basic HTTP authentication.
As successful response will include a new access_token and a new refresh_token, which you will need to stored in replacement of the previously used refresh token:
{
  "access_token": "THE_ACCESS_TOKEN",
  "token_type": "Bearer",
  "expires_in": ACCESS_TOKEN_MILLI_LIFETIME, // 10 mins.
  "refresh_token": "REFRESH_TOKEN",
  "scope": "scope1+scope2..."
}
Note that the refresh token has a lifetime of 60 days. If left unused, it will expire after this period and the user will need to reauthorize your application.
Updated about 2 months ago