

Prerequisites
Before you begin:- You have completed How to Fetch and Match Vendors and found a matching Pleo Vendor whose details differ from the AS
- Your integration is authenticated using one of the supported authentication methods
- Your integration can call Pleo’s Vendors API endpoints
Scenario
This how-to continues from the How to Fetch and Match Vendors scenario: “Kaffehuset AS” (EXT-004) is active in both systems, but its country and currency differ (Pleo hasSE/SEK, the AS has DK/DKK).
Steps
1. Update the Vendor
API Endpoint: PUT/v1/vendors/{id}
The “Kaffehuset AS” Vendor’s country and currency are updated from SE/SEK to match the AS values of DK/DKK in this example.
Example Pseudo:
- OAuth 2.0
- API Key
Example Response
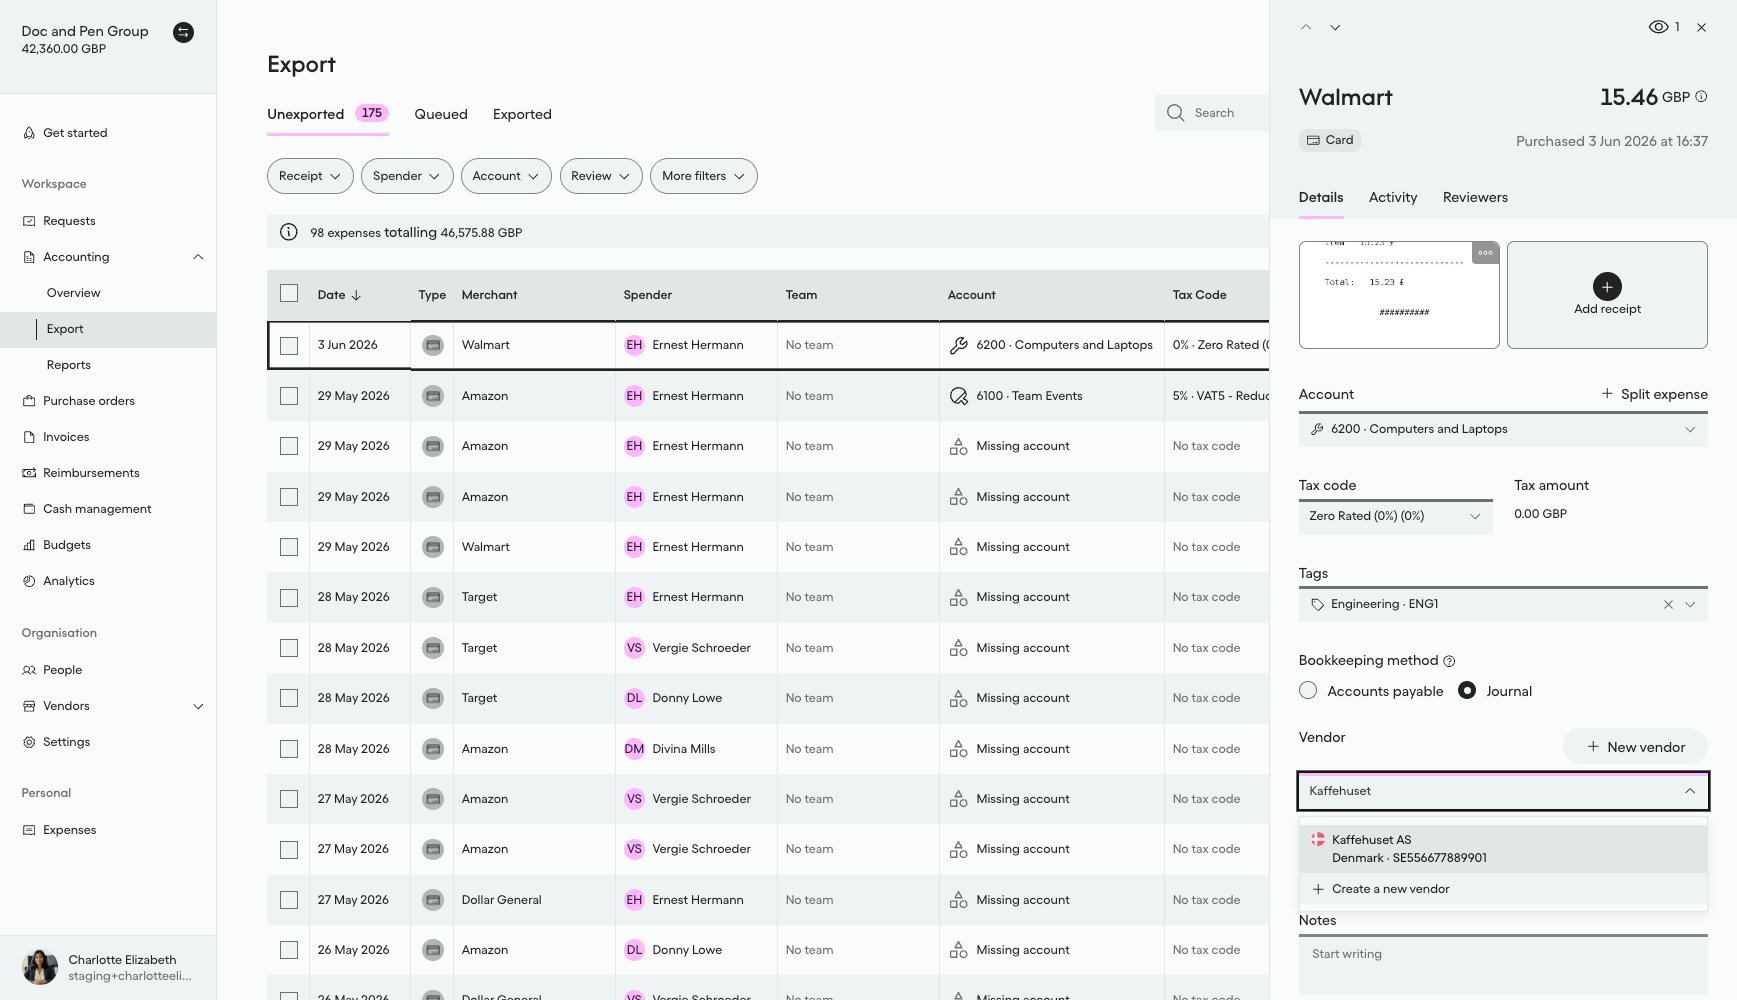
What it looks like in Pleo Web App
- Select Accounting from the main left-hand navigation.
- Select Export from the sub-menu.
- Click on a row to open the details panel for that expense.
- Select the Vendor drop-down menu and type “Kaffehuset” to search.
Handling Edge Cases
See Handling Edge Cases on How to Create Vendors for partial-failure and unknown-outcome handling, which applies to this write too.Result
What Comes Next?
this how-to is part of:
Related Reading
- How to Fetch and Match Vendors
- How to Archive Vendors
- Vendor Sync Data Mapping
- Platform Capabilities: Vendor Sync