

Prerequisites
- You have completed Pleo’s registration process
- You have received your Client ID and Client Secret from Pleo
- You have logged into Postman and have created a collection
Steps
1. Configure a new token
- Open your Postman collection
- Click the Authorization tab
- Select OAuth 2.0 as the Auth Type

- Scroll to the Configure New Token section
- Provide the following configuration:
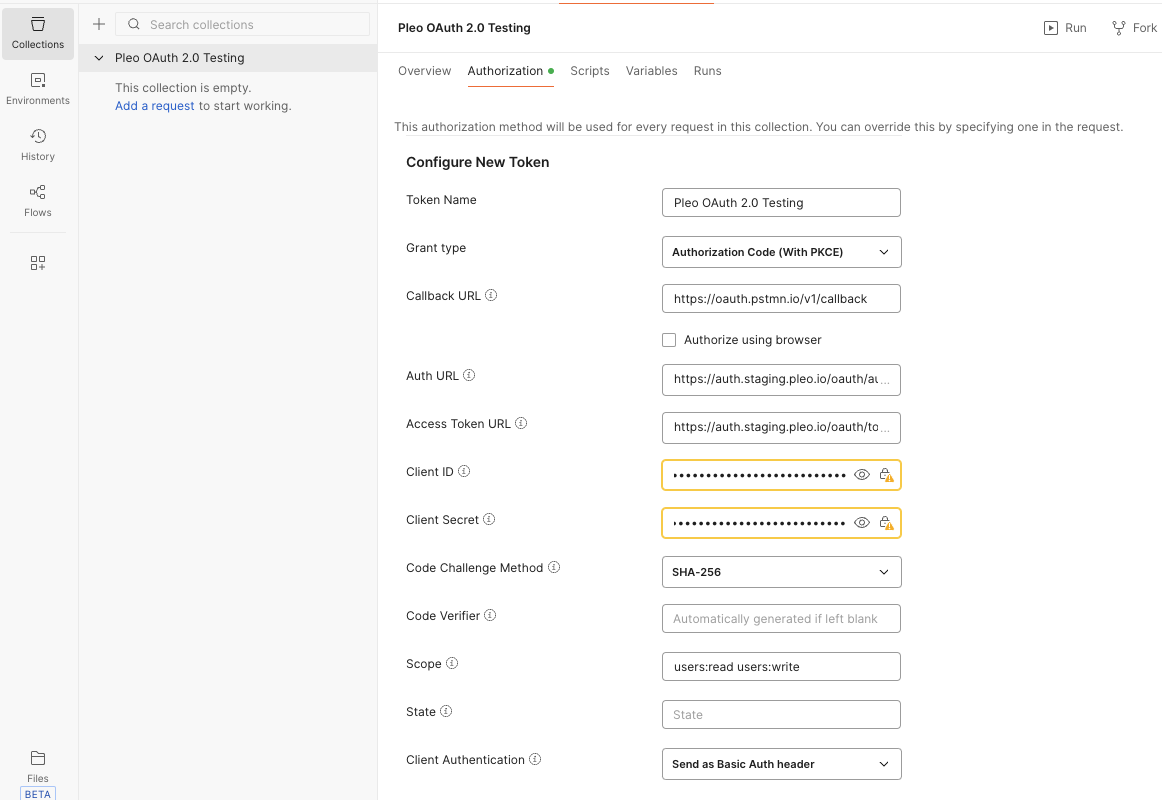
2. Get a new Access Token
- Scroll down and click Get New Access Token.
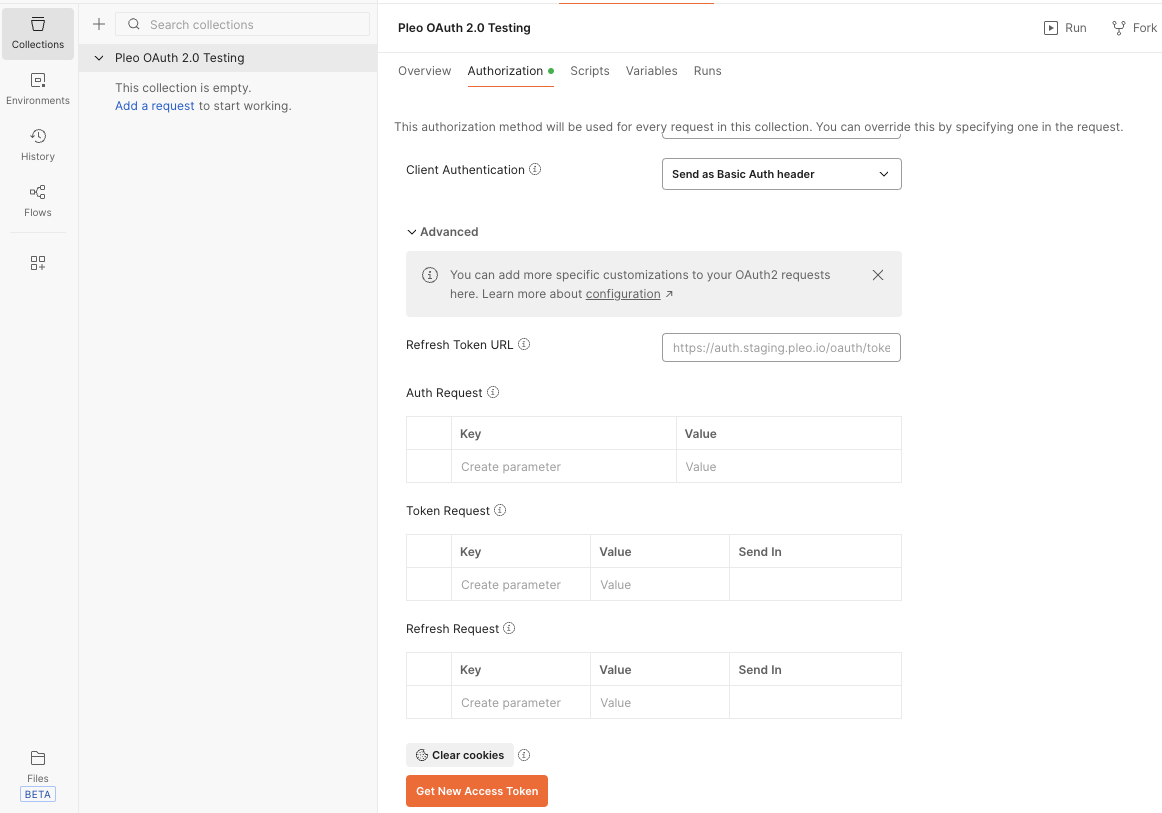
- A new browser window opens and redirects you to Pleo’s authorisation server
- Complete the authorisation process and grant access using your staging credentials
- After authorisation, you are redirected back to Postman
- Click Use Token
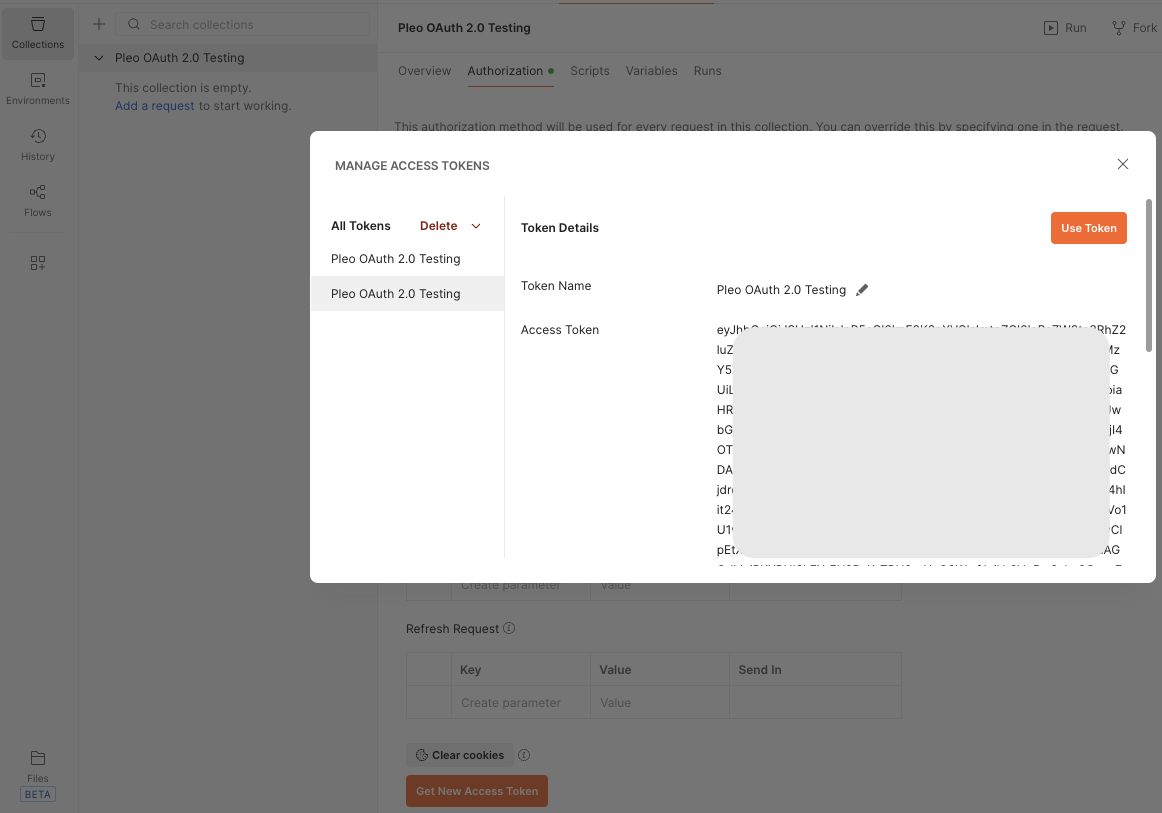
Result
- Postman is configured to authenticate with Pleo using OAuth 2.0
- You can make authenticated requests to Pleo’s staging APIs
- Postman manages the access token lifecycle automatically
What Comes Next?
this how-to is part of:
Related Reading
- OAuth 2.0 Setup Workflow Guide Step-by-step instructions on how to configure OAuth 2.0 where you handle the full token lifecycle